All features / Animation & timeline
Align a soundtrack to frame animation
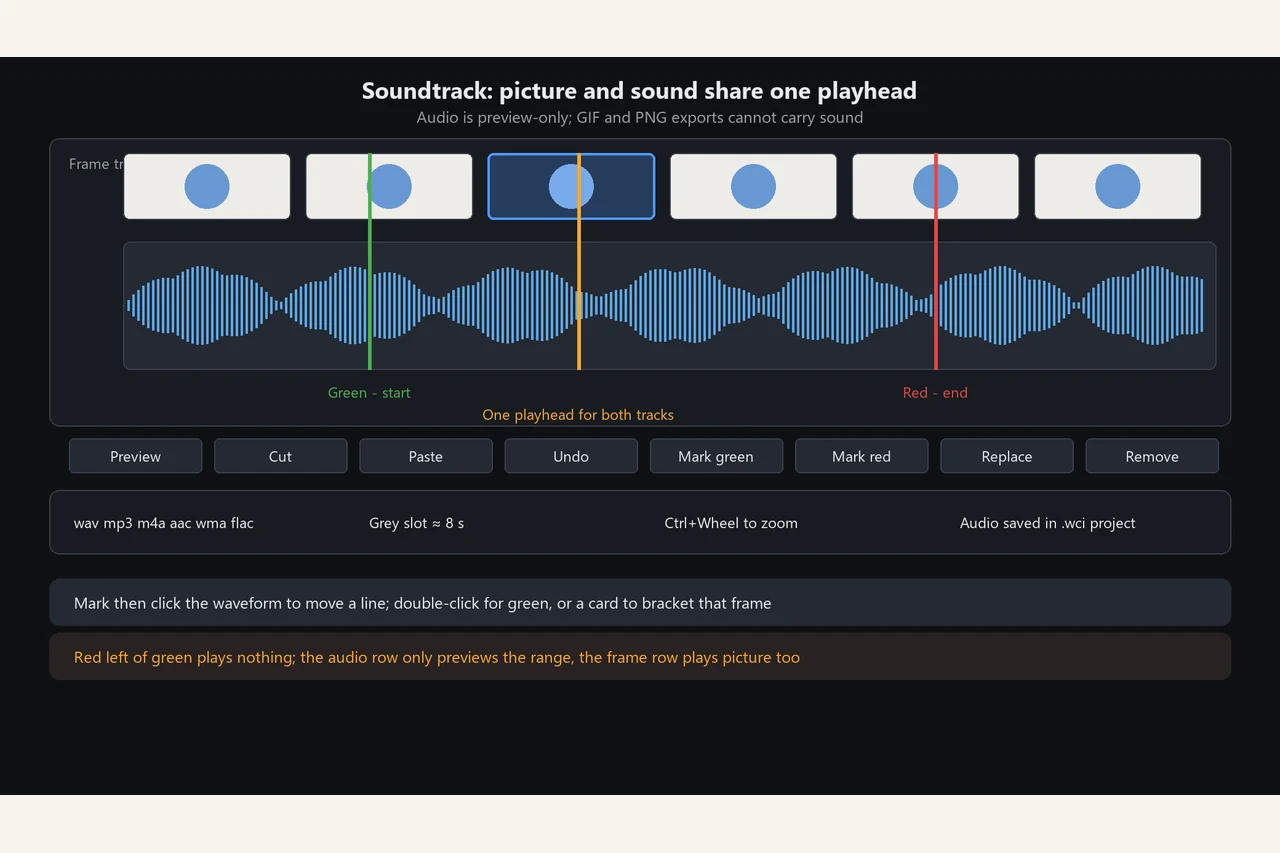
Import a waveform under the frame track. Both tracks share one playhead, and the green and red markers define exactly which part plays.
WORKFLOW
How it fits your workflow
One shared axis for picture and sound
Green starts, red ends — set both on the waveform
Cut and paste audio with an undo step
PRACTICAL GUIDE
How do I line the audio up with the picture?
Click Audio to import a wav, mp3 or m4a file; a waveform appears below the frame track. Both tracks share one playhead. Green marks the start, red the end, and double-clicking a frame card brackets exactly that frame.
Can a GIF carry the soundtrack?
No. GIF and PNG sequences contain no audio. Export MP4 when the finished clip needs sound.
What if the range is backwards?
If the red marker sits left of the green one, playback will not start. Put both markers in time order first.
STEP BY STEP
How to use it in the software
Soundtrack: add audio to your animation
What it does
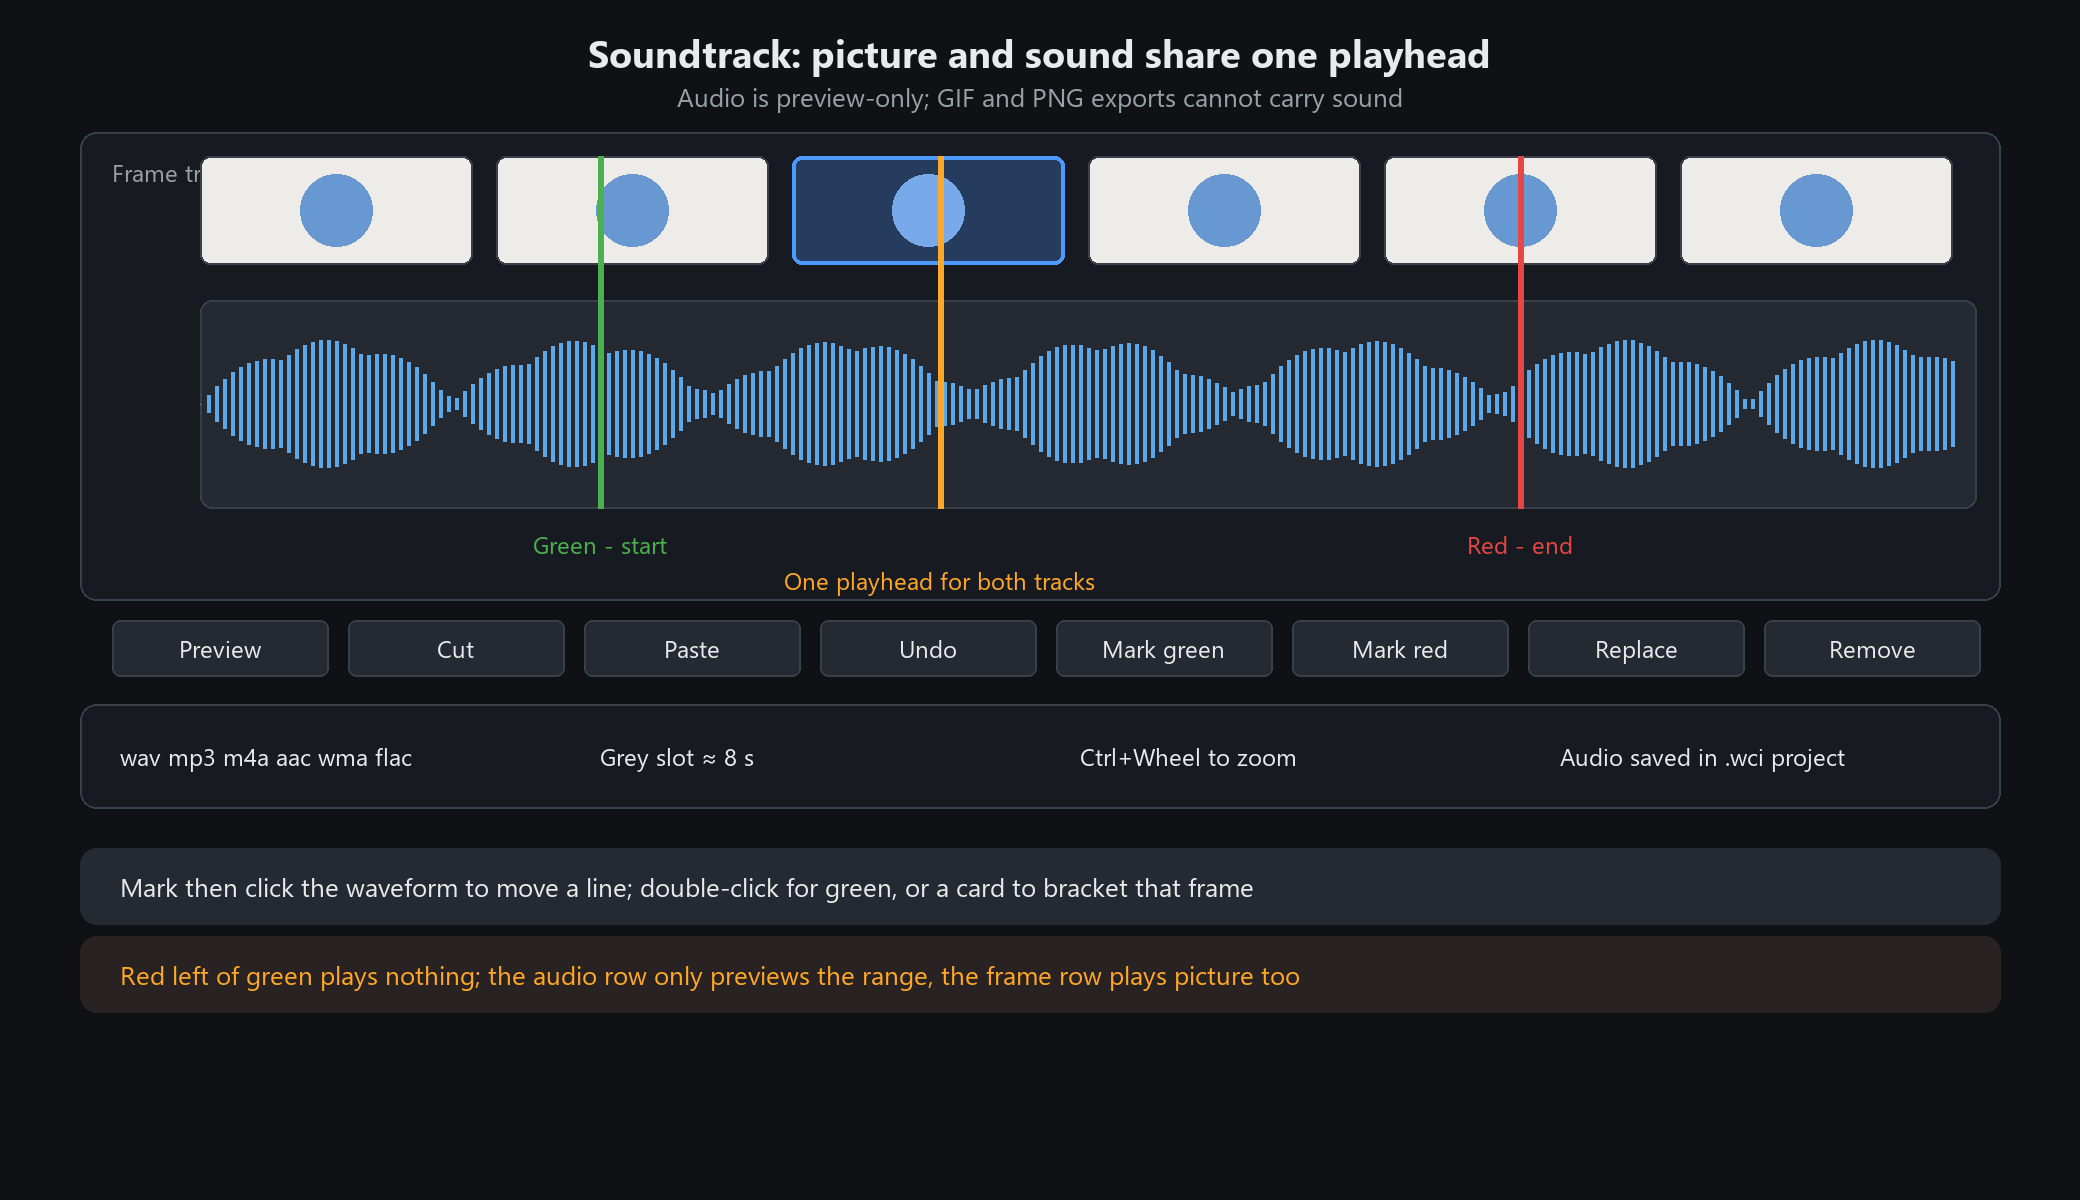
Click Audio in the toolbar to import a sound and a waveform track appears below the frame track. Both tracks share one horizontal axis and one playhead, so picture and sound stay in sync. The green marker is the start, the red marker the end; playback follows that selection. MP4 exports include the soundtrack; GIF and PNG exports have no audio.
Import and formats
wav / mp3 / m4a / aac / wma / flac are supported; an audio stream inside a video file can be imported on its own.
After import the audio row shows a waveform and a toolbar: Preview Play, Cut, Paste, Undo Cut/Paste, Mark Green, Mark Red, Replace, Remove, plus Audio Info (file / format / duration / sample rate / channels / size / selection).
Audio is saved inside the .wci project. Closing a document with audio prompts you to save an editable project first; exporting straight to PNG/JPG loses the sound.
Green and red markers = the playback range
Green (start) and red (end) store positions in the audio's own timeline. Click Mark Green / Mark Red, then click the waveform to move that line; double-click the waveform to place the green marker directly.
The audio row's ▶ previews only that range without moving the picture; the frame row's ▶ plays picture and sound together: the start frame is derived from the green marker, audio starts at green and the red marker is moved to the end of the animation.
Double-click a frame card to bracket exactly that frame with green and red (this sync happens only when you actively select a frame — switching frames never changes the range on its own).
Alignment and editing
Drag the audio track sideways to shift it as a whole and line a picture up with a beat. That offset affects only this preview; it does not move frames and is not written into the project.
Cut / Paste removes the selected audio range and inserts it at the green marker, changing the audio itself; Undo Cut/Paste reverts it. Large files briefly show a processing message.
Ctrl+Wheel zooms the timeline; click the zoom label to return to 100%. Grey slots are about 8 seconds each, so long audio needs horizontal scrolling.
When not to use it
Choose MP4 to export a finished clip with the soundtrack; GIF and PNG sequences have no audio.
A reversed range (red left of green) will not play — put the markers in order first.
Do not expect a very long track to fit on one screen; zoom with Ctrl+Wheel or use the bottom scrollbar.
STEP BY STEP
Feature 16 · Video production
Need exact settings and steps? Read the matching chapter of the in-app manual online.