All features / Animation & timeline
Frame-by-frame animation on a Windows timeline
Draw one frame, freeze the whole layer stack, and play the sequence back. Camera moves, transitions and per-frame timing all live on the same timeline.
WORKFLOW
How it fits your workflow
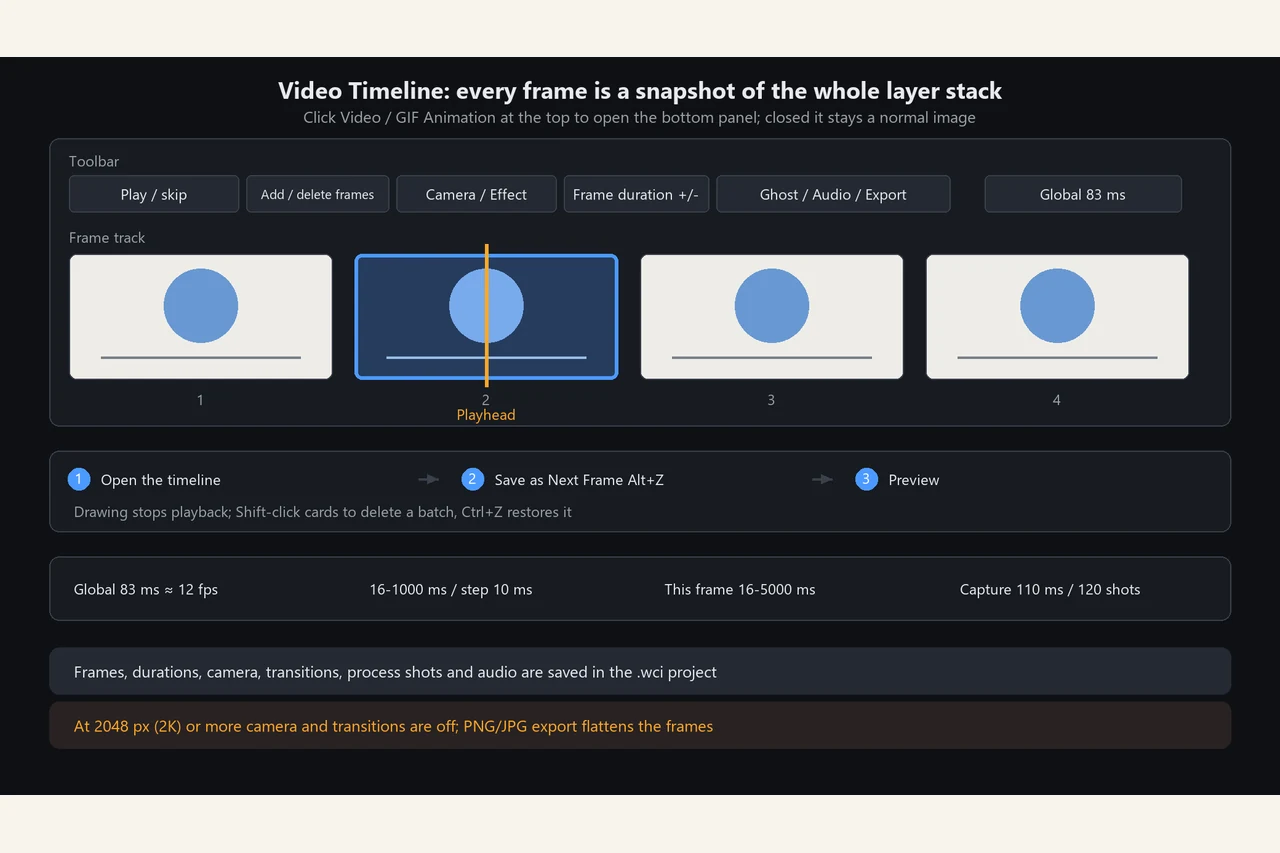
Each frame is a snapshot of every layer
Set a global 83 ms hold or give one frame its own duration
Preview camera moves and hard cuts before exporting
PRACTICAL GUIDE
How do I arrange frames on the timeline?
Open Video / GIF Animation to reveal the bottom timeline, draw frame one, then press Alt+Z to save it as the next frame — the app switches to that frame so you can keep drawing. The global hold is 83 ms (about 12 fps); a single frame can be set from 16 to 5000 ms.
Do I need the timeline for a still image?
No. With the timeline collapsed it is an ordinary image document and lighter. Only open it when you are making an animation.
Do camera moves work on a large canvas?
At a canvas edge of 2048 px (2K) or more, camera moves and transitions are disabled automatically and only hard cuts remain. Reduce the canvas size first.
STEP BY STEP
How to use it in the software
Video Timeline: turn frames into animation
In one sentence
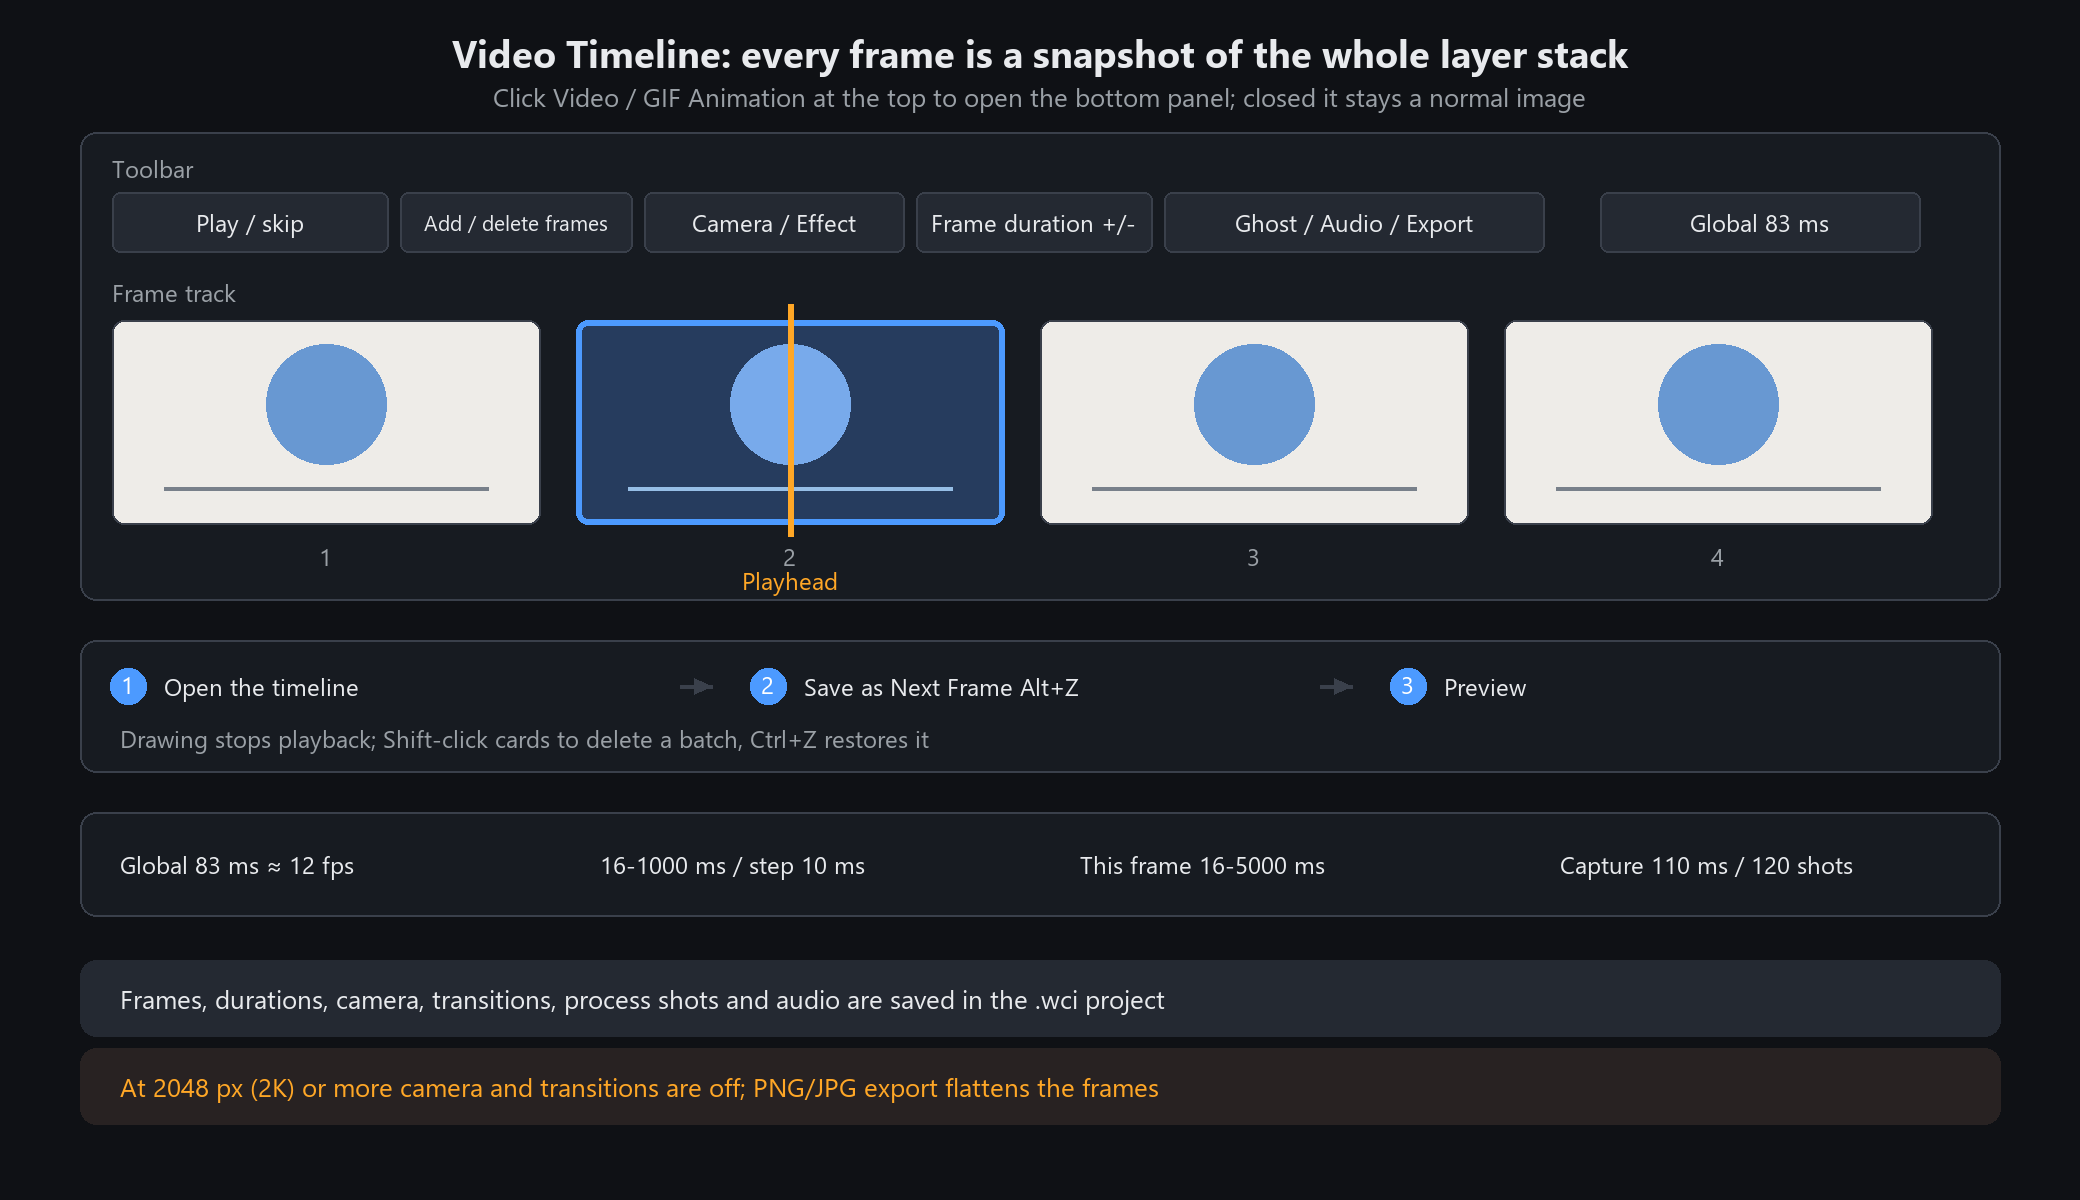
Click Video / GIF Animation at the top right and a timeline opens below the canvas. Each frame is a snapshot of the whole layer stack — not one layer, but the complete picture at that step. Draw and edit frame by frame; playback joins them into animation. With the timeline closed, the document behaves exactly like an ordinary image.
Make your first animation in three steps
1. Open a canvas and click Video / GIF Animation to expand the bottom timeline; click again to collapse it.
2. Draw frame one, then click Save as Next Frame (or press Alt+Z): the current picture is frozen into a new frame after it and you are switched to that frame to keep drawing. Use Add Blank Frame next to it if you want to start from empty.
3. Click Play / Pause to preview; drawing a stroke stops playback automatically. First / Previous / Next / Last jump between frames.
Timeline toolbar
Playback: Play / Pause, First, Previous, Next, Last.
Frames & record: Add Blank Frame, Save as Next Frame (Alt+Z), Delete Frame (undoable), Record Drawing. Shift-click several frame cards to delete them as a batch; Ctrl+Z restores the batch.
Camera / Effect / Object: select a frame before setting camera moves or transitions. For object animation, first select a stroke, image, text or shape on the canvas (see below).
This frame's duration − / +: each press changes only this frame by 10 ms; it can be shorter than the global duration.
Ghost / Audio / Export: onion-skin-style frame echo, soundtrack import, animation export. The separate Global 83ms at the far right is the default speed for the whole animation; on narrow windows the rest moves into More.
Speed and timing (everything in milliseconds)
Global frame hold: 83 ms by default (about 12 fps). The Global 83ms flyout has − / + in 10 ms steps, range 16-1000 ms; larger numbers are slower. Every frame without its own duration uses this.
Per-frame duration: 16-5000 ms; 0 means Follow Global. Press + to hold one frame longer.
Double-click a frame card to bracket exactly that frame with the green / red markers (used with audio, see the Soundtrack topic). The status bar shows frame count, memory in MB and the current frame — watch that number as frames pile up.
Two helpers
Ghost: the previous frame tinted red and the next frame tinted blue over the canvas, for alignment only — never exported. Wheel adjusts strength, Shift+Wheel changes how many frames are shown; hidden during playback and in single-frame documents. Do not confuse it with Layer Onion Skin: that dims layers, Ghost overlays neighbouring frames.
Record Drawing: each stroke creates intermediate pictures so playback shows the drawing growing. By default, five strokes stay on one editable frame; the sixth creates the next frame before drawing. Bucket fills and shapes count too. Set 1–20 strokes or manual frame advance under Timeline More → Strokes per frame; Alt+Z always creates the next frame. Recording captures every 110 ms, up to 120 pictures per stroke. Playback defaults to 83 ms per process picture under More → Stroke and fill interval. The audio scale and export timing follow that setting. Process pictures have no editable layer structure.
When not to use it
A single still image: leave the timeline closed; a plain document is lighter.
Canvas edge at 2048 px (2K) or more: camera moves and transitions are disabled automatically, leaving hard cuts only (see the Camera & Transitions topic).
A frame is a copy of the whole layer stack, so memory grows quickly with many layers and frames; the MB figure in the status bar is a live warning.
Frames, durations, camera, transitions, process shots and audio are all saved in the .wci project. Exporting to PNG/JPG flattens everything and you can no longer edit frames.
Camera Moves & Transitions
Two different things
Camera controls how the view moves while one frame is shown (zoom in, zoom out, pan). Transition / Effect controls how that frame changes into the next (fade, wipe and so on). Both can be on at once, in this order: camera move finishes → hold one beat → transition → next frame. Both act on the selected frame: click a frame card first (small badges appear in its top-right corner), then open the Camera or Effect flyout. The last frame has no next frame, so it cannot have a transition.
Camera: 7 moves
Static (default), Zoom In, Zoom Out, Pan Right, Pan Left, Pan Up, Pan Down. Zoom changes scale; pans shift the view.
Strength 5-60%, 30% by default — how obvious the movement is.
Camera duration 1000 ms by default, range 100-5000 ms, fully independent of the frame's hold time: a frame with a camera move plays for the camera duration, not the hold value. When the move reaches its end, the picture holds for one beat before cutting away, instead of jumping immediately.
Effect: 17 transitions
Basic: Hard Cut, Cross Fade, Fade through Black, Fade through White.
Directional: Wipe Right / Left / Down / Up, Slide Right / Left / Down / Up.
Shape & grain: Iris, Mosaic Dissolve, Blinds, Pixelate, Glitch.
Transition duration 1000 ms by default, range 100-2000 ms (flyout − / + in 50 ms steps). It is added on top of the frame's hold, so it never quietly eats the time you set for that frame. Choose Hard Cut or reduce the duration to 0 for an instant switch.
Rhythm when combined
Give frame 2 Zoom In 30% / 1000 ms plus Cross Fade 1000 ms and playback shows the frame slowly zooming, holding one beat at the end, then a full second of cross fade before frame 3. GIF and PNG-sequence export expand this into real pictures, using exactly the same timing as the screen.
When it does nothing / when not to use it
Canvas edge ≥ 2048 px (2K): both camera and transitions are disabled (they keep whole-frame pixels resident and blend every beat, which drops frames badly at 4K). The status bar says so and the flyouts block the setting. Downsize the canvas first.
No frame card selected: the flyout will not touch the frame you had in mind.
A quick snap to the next frame: skip transitions; Hard Cut is cleanest. A transition is extra time and lengthens the whole animation.
Content already sitting at the edges: zoom and pan crop it away — leave some margin first.
STEP BY STEP
Feature 16 · Video production
Need exact settings and steps? Read the matching chapter of the in-app manual online.