All features / Drawing & coloring
Color line art on Windows
Turn a scanned sketch or clean line drawing into a colored illustration. Prepare the lines, choose a fill method and refine the edges on editable layers.
WORKFLOW
How it fits your workflow
Work with open or imperfect line art
Choose buckets and brushes for different edges
Export the finished image while keeping the project editable
Practical details before you begin
For scanned drawings, first make the linework readable and decide whether white paper should remain visible. Put the sketch above the color layers so new color does not cover the outlines.
Use a bucket for broad enclosed areas and an area brush for open or irregular shapes. Check small gaps at high zoom, then export a flattened image while keeping the layered project for later changes.
PRACTICAL GUIDE
How to color line art with open edges
Keep the line layer above the color layers. Use a bucket for enclosed areas; draw the region with Area Paint when a contour is open or irregular, then refine its edge on a separate layer.
Why does fill spill outside my scanned line drawing?
A tiny gap in the outline or unsuitable tolerance can let color escape. Zoom in to inspect the line, or draw the target region with Area Paint.
Why did coloring cover the black outlines?
Move the line art above the color layers, or create a new layer underneath it before filling.
STEP BY STEP
How to use it in the software
What it is: one-click colour for line art
One click turns a black-and-white line drawing into a coloured one. It runs entirely on your machine — no upload, no internet — and finishes in a few seconds.
It reads lines: transparent line art, comic line art, hand-drawn sketches, inked drawings all work
It uses the same colouring engine as Photo restore → Colourise, but adapted specifically for line art
The result is its own layer, so you can keep painting on it afterwards
This is smart colouring: you give the lines, the software gives the colours. Not a preset filter — the colour is recomposed for each drawing
Two steps to colour
How
1. Open a line drawing (transparent line art works best; sketches from the Asset library are already transparent)
2. Menu Image → Colourise line art — the panel jumps to the Colourise tab; click Colourise
It decides for itself
The app checks how much of the canvas is transparent and decides this is line art
Once detected, colouring takes the two line-art-only paths (next topic), not the photo path
Cannot find the entry? Portrait → Photo restore → Colourise also reaches the same page. Both end on the Colourise tab
Two kinds of result
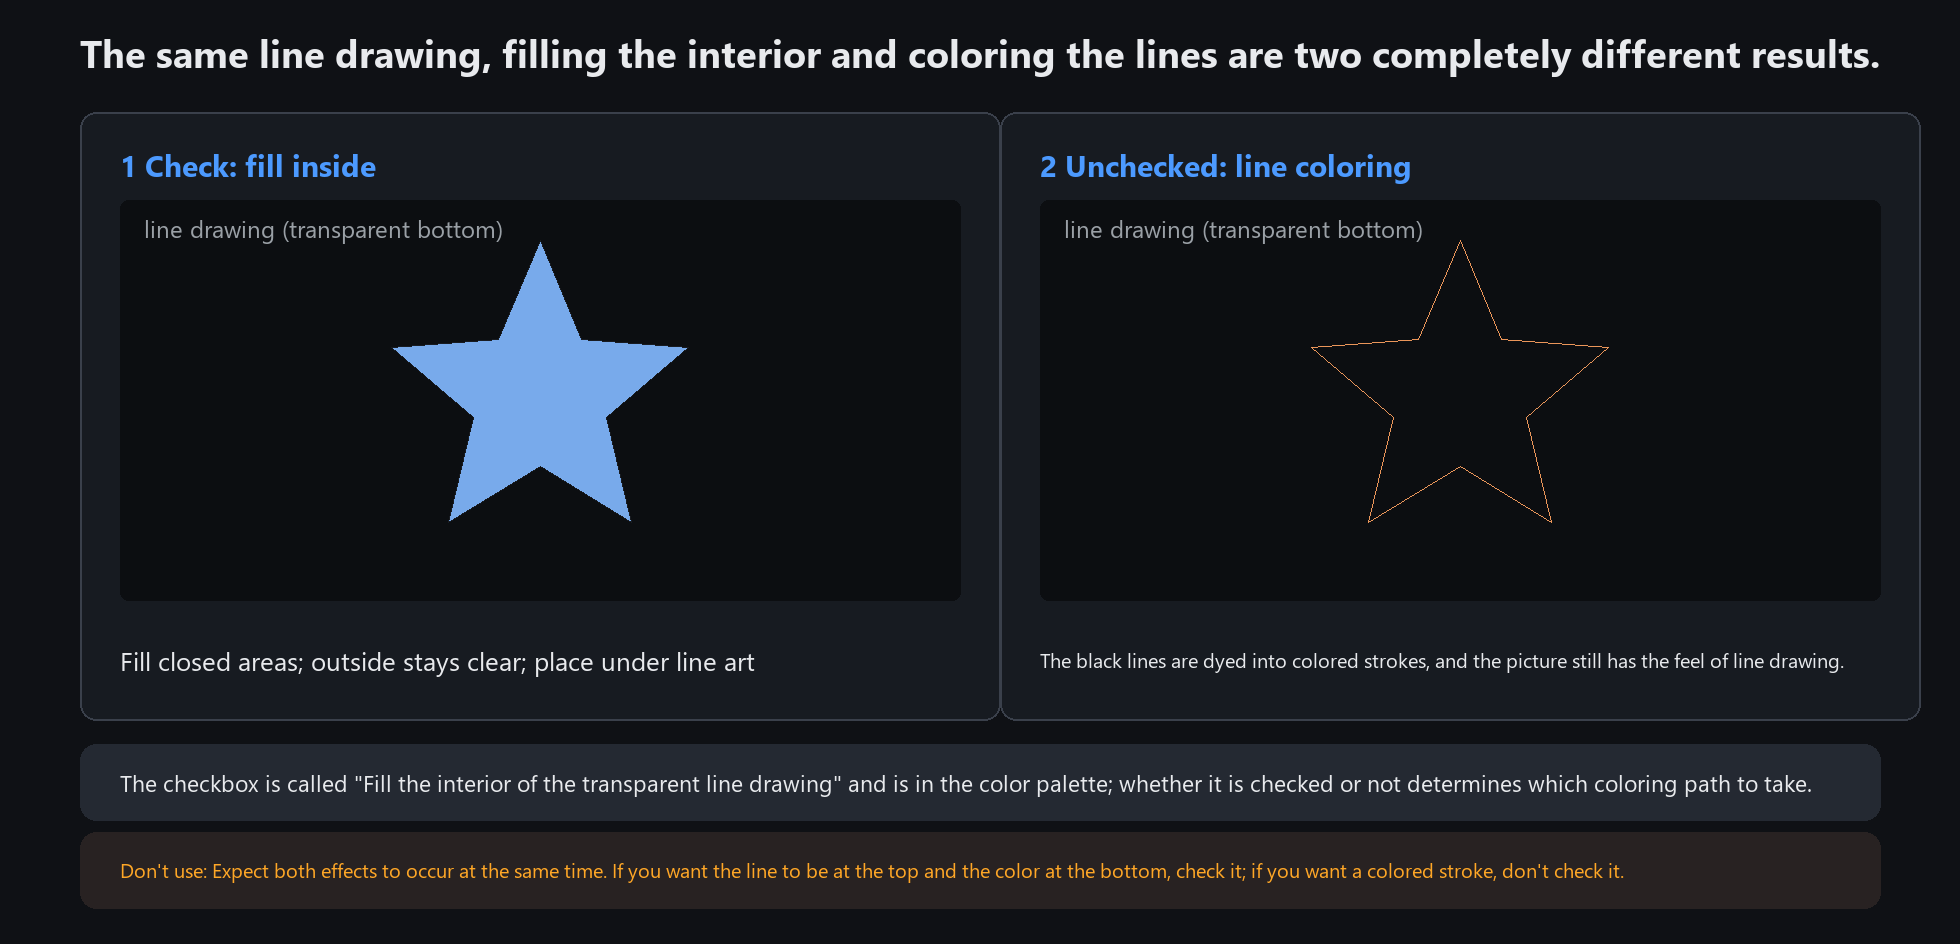
Before colouring there is one switch: Fill transparent line art interior (the checkbox in the panel). Tick or not, the output is completely different.
Tick it: fill the enclosed areas with colour
The inside of the line art is filled; outside the lines stays transparent
You get a coloured layer you can stack under the original black lines, so the lines always stay on top
Good for: colouring books, comic flatting, laying base colour under transparent line art
Leave it off: colour the lines themselves
The software tints the black lines (coloured outlines) while the drawing keeps its line-art feel
Good for: keeping the hand-drawn look but with a hint of colour
Want lines on top and colour underneath? Tick fill interior. Want coloured outlines? Leave it off
STEP BY STEP
Feature 9 · Smart line-art colouring
Need exact settings and steps? Read the matching chapter of the in-app manual online.