Feature 9 · Smart line-art colouring
6 topics from the in-app manual.
What it is: one-click colour for line art
One click turns a black-and-white line drawing into a coloured one. It runs entirely on your machine — no upload, no internet — and finishes in a few seconds.
It reads lines: transparent line art, comic line art, hand-drawn sketches, inked drawings all work
It uses the same colouring engine as Photo restore → Colourise, but adapted specifically for line art
The result is its own layer, so you can keep painting on it afterwards
This is smart colouring: you give the lines, the software gives the colours. Not a preset filter — the colour is recomposed for each drawing
Two steps to colour
How
1. Open a line drawing (transparent line art works best; sketches from the Asset library are already transparent)
2. Menu Image → Colourise line art — the panel jumps to the Colourise tab; click Colourise
It decides for itself
The app checks how much of the canvas is transparent and decides this is line art
Once detected, colouring takes the two line-art-only paths (next topic), not the photo path
Cannot find the entry? Portrait → Photo restore → Colourise also reaches the same page. Both end on the Colourise tab
Two kinds of result
Before colouring there is one switch: Fill transparent line art interior (the checkbox in the panel). Tick or not, the output is completely different.
Tick it: fill the enclosed areas with colour
The inside of the line art is filled; outside the lines stays transparent
You get a coloured layer you can stack under the original black lines, so the lines always stay on top
Good for: colouring books, comic flatting, laying base colour under transparent line art
Leave it off: colour the lines themselves
The software tints the black lines (coloured outlines) while the drawing keeps its line-art feel
Good for: keeping the hand-drawn look but with a hint of colour
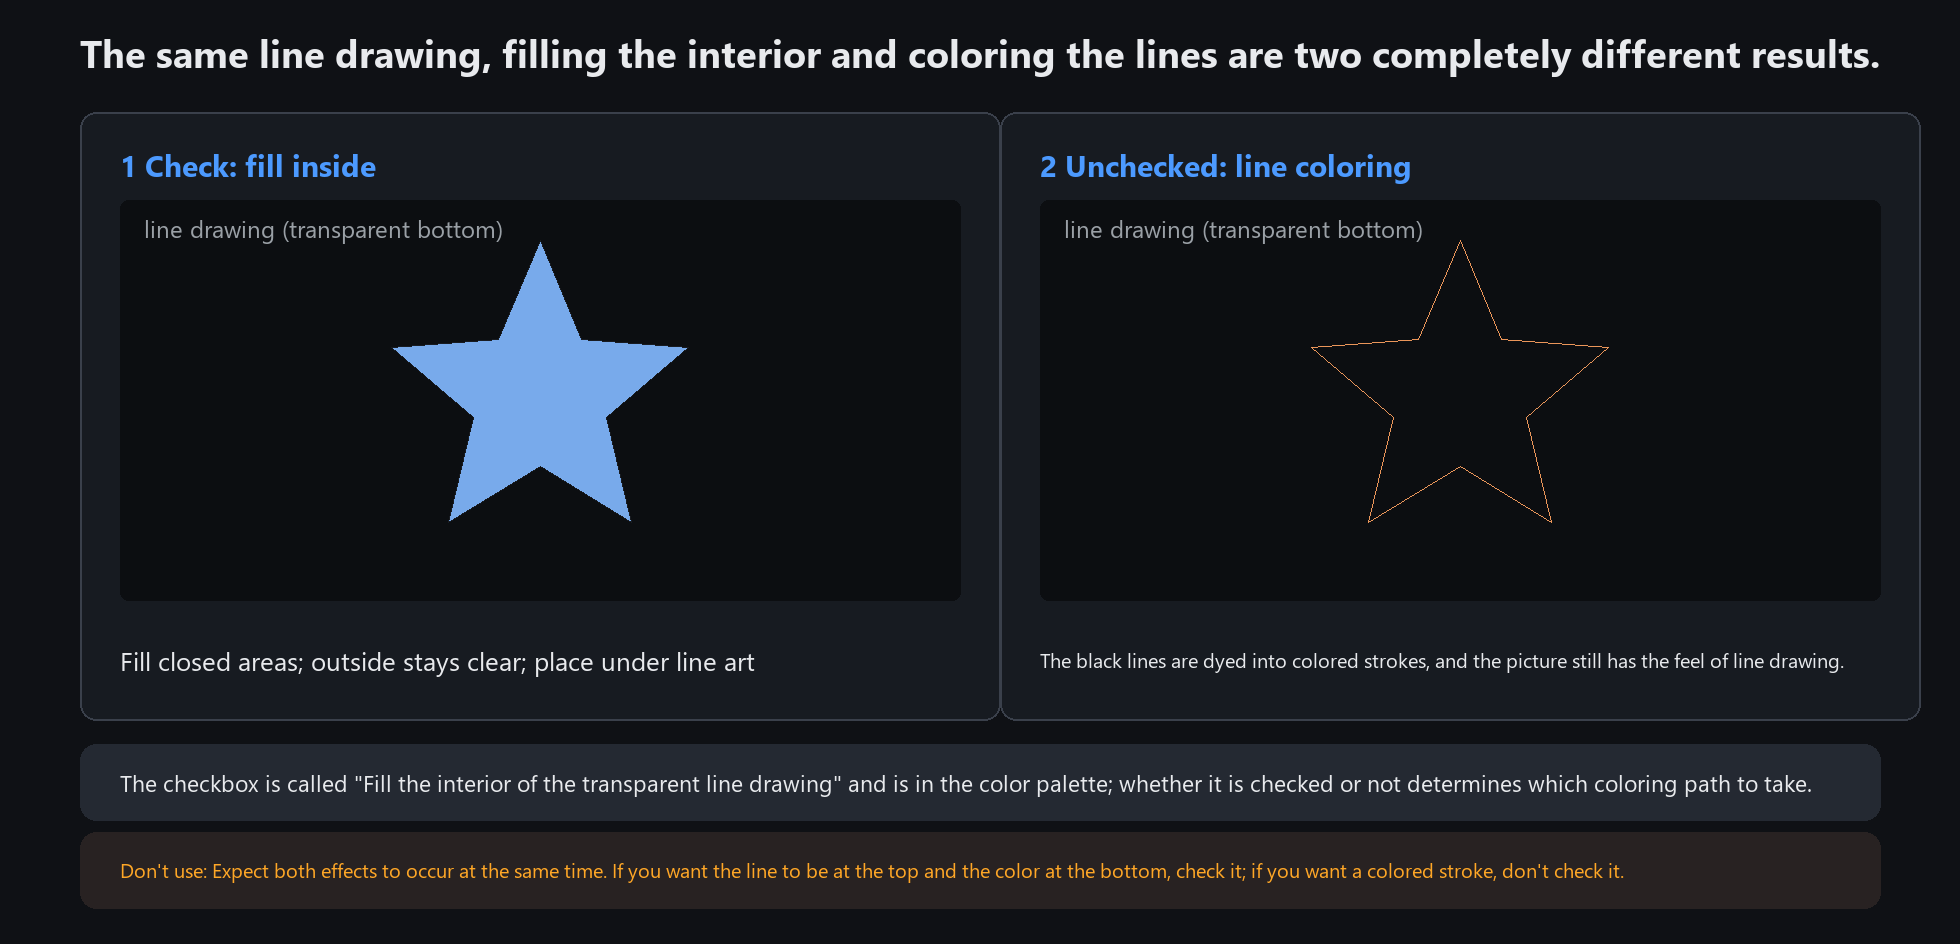
Want lines on top and colour underneath? Tick fill interior. Want coloured outlines? Leave it off
Five sliders and the main hue
The Colourise tab has five sliders plus a main-hue palette. For line art, the first two matter most; tweak the rest as needed.
Colour strength: 0 keeps the original greys, 100 is the model's own colour. Too vivid? Drop to 70
Remove yellowing: tick it if the line art has an old-paper yellow edge; clean line art does not need it
Vibrance: enhances colours that exist, without inventing colour in blank areas
Background protection: reduces miscolouring at the edges (line art is already transparent, so this barely matters)
Main hue strength + main-hue palette (none / red / orange / yellow / green / blue / purple / brown / custom): force a hue on the subject, e.g. green for a uniform
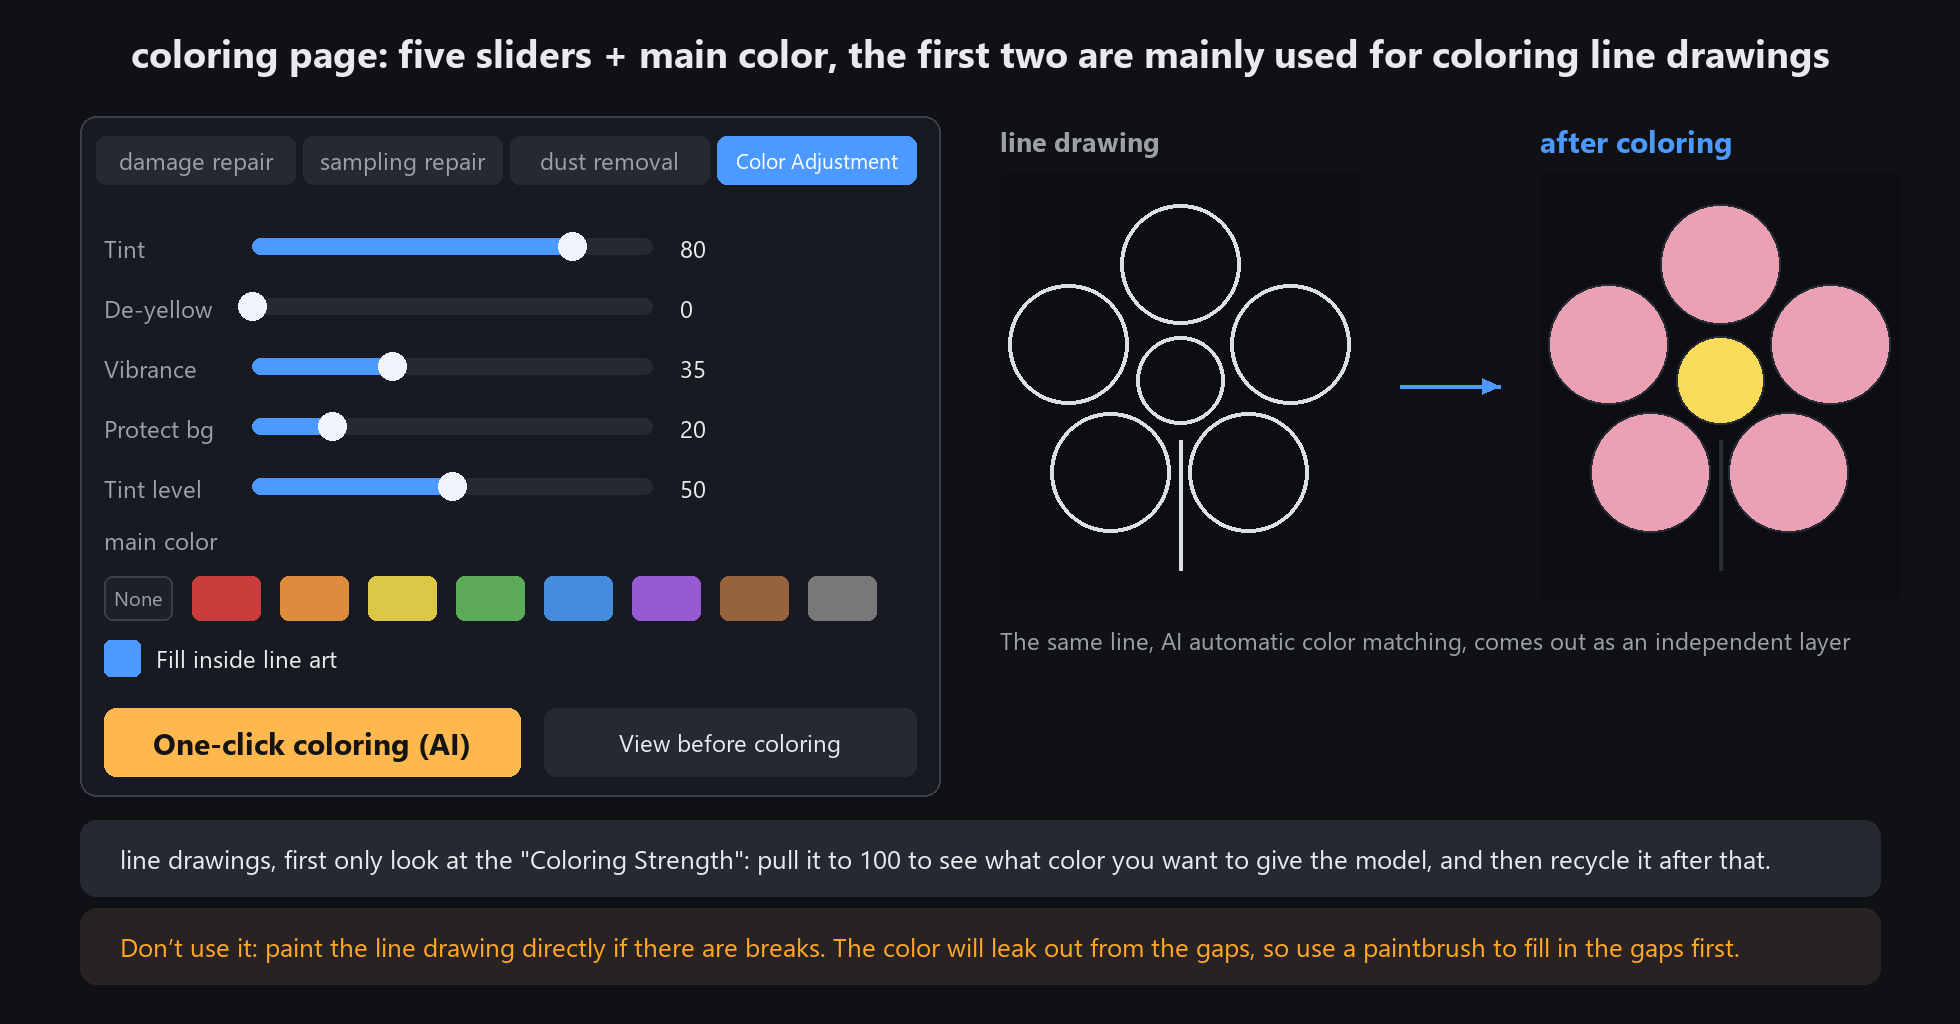
For line art, look only at Colour strength first: push to 100 to see what the model wants to give, then pull back if it is too much
What works well
Works well
Transparent background, black lines, clear contrast
Enclosed areas closed as much as possible (so colour does not leak out)
Want safety? Tick Fill transparent line art interior
Easy to go wrong
Gaps in the line art: colour leaks out through the break. Patch the gap with a brush first, then colourise
Lines too faint or grey: the software cannot see the edges and colours messily. Push the contrast up first
Do not use it for
This colours line art. For ordinary photos, use Photo restore → Colourise
Want fully controlled colours? Do not expect the software to nail it in one pass — keep painting on the Smart colour layer afterwards
To check for gaps: zoom the line art to 400% and trace the line to see if anything is broken
How it differs from photo colour and hand painting
Not the same as Photo restore → Colourise
Photo colourising colours the greyscale of a real photo, reading light, shadow and objects
Line-art colourising colours the lines, reading enclosed areas and stroke directions
The same Colourise button picks the path automatically from the canvas; you do not switch manually
Its relation to colouring by hand
The software lays down the big base colours, sparing you the most tedious part after inking
Detail, palette tweaks and picking a colour for one region are still your brush work
The resulting Smart colour layer can be edited or undone freely
Treat it as a colouring assistant that knows palettes, not a one-click finish: base colour to it, refinement to you