Feature 8 · Pen tablet
3 topics from the in-app manual.
Pen tablet: the four controls that appear
Where
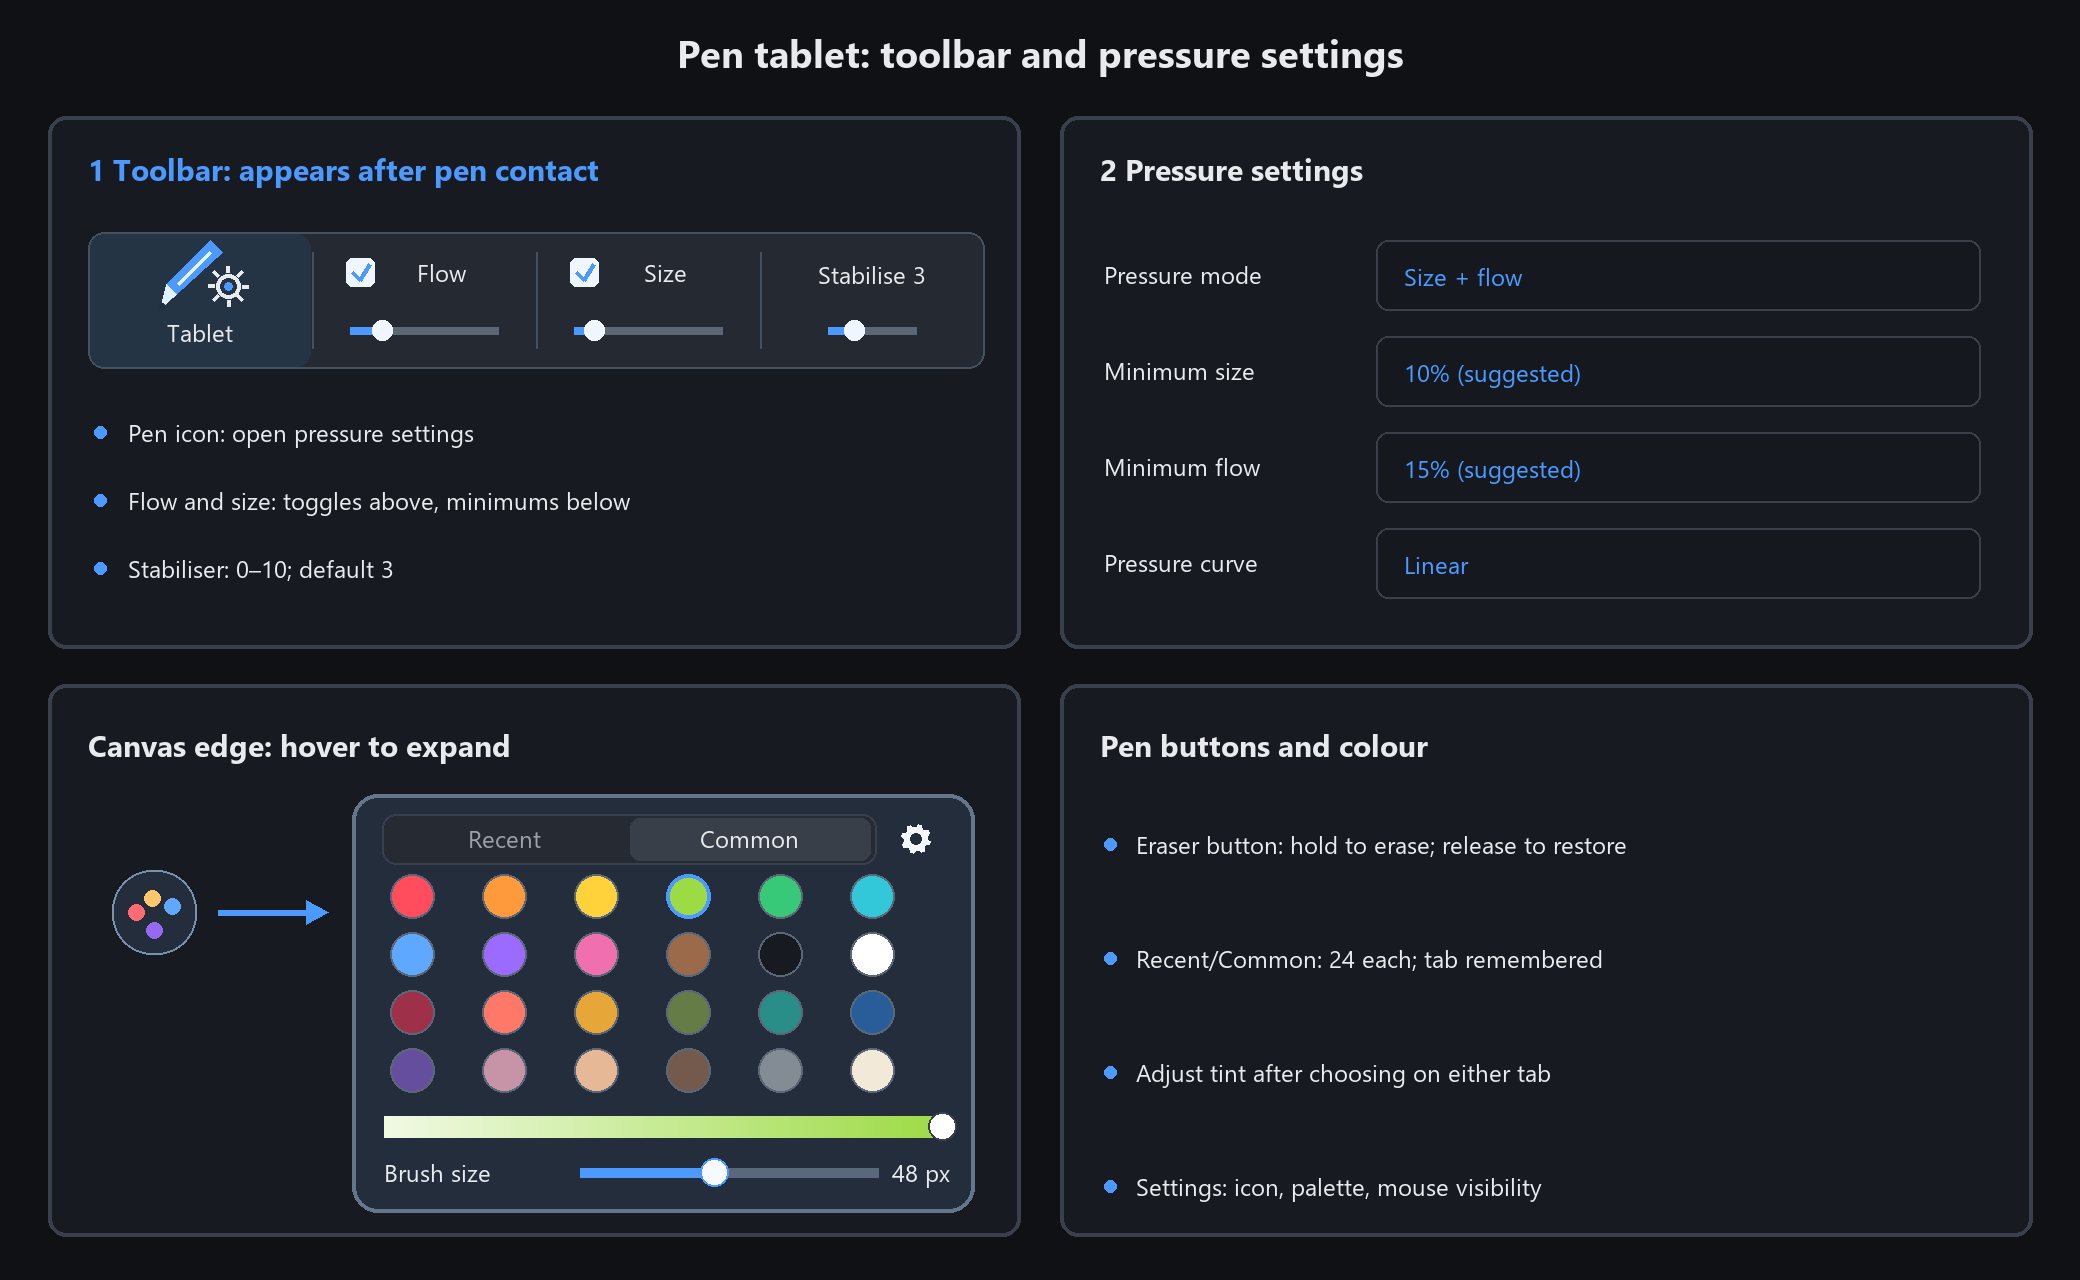
Tap the canvas once with the pen and a new group appears at the right of the toolbar:
a pen icon, two checkboxes (flow / size) and a stabiliser slider. Mouse-only users never see it.
The four controls
Pen icon: opens the tablet pressure settings window
Flow / Size: click the upper half to toggle pressure; drag the short slider below to set minimum flow / size. Wheel over the slider changes 1% per notch, or 5% with Shift
Stabiliser 0~10: steadies hand jitter, default 3
Pen side buttons and colour
Temporary eraser button: when the device sends a barrel click, hold for the eraser; release to restore the previous tool
Other side button: the app leaves its driver action alone. If it was set to zoom, it still zooms
To choose a colour, tap a colour swatch or the eyedropper in the app. Recent colours are saved and remain available after restarting
Quick panel beside the canvas
When a pen enters the canvas, a small icon appears halfway down the right edge. Hover a colour dot with the pen or mouse to highlight it; moving away restores its normal appearance
Switch between Recent and Common tabs, with 24 small colour dots each. Empty Recent slots use common colours, and the chosen tab is remembered after restarting. The light-to-dark tint bar works on both tabs; drag the lower slider to adjust brush size
Use the settings button at the top right of the palette to choose whether it collapses to an icon or stays open, whether it appears while drawing with a mouse, and whether to show it at all. If hidden, reopen it in Software Settings → Pen Colour Palette
In the brush list, tap a brush to select it or drag the scrollbar to browse
What the settings window offers
Pressure mode: off / width only / flow only / both
Min size % (suggested 10): the floor for stroke width at light pressure
Min flow % (suggested 15): the floor for paint flow at light pressure
Pressure curve: soft / linear / firm
The app reads Windows pointer messages directly — most tablets and pen displays give pressure without any vendor driver.
You do not need to change the pen button settings in the tablet driver.
Tuning pressure: curve, minimums and stabiliser
One formula
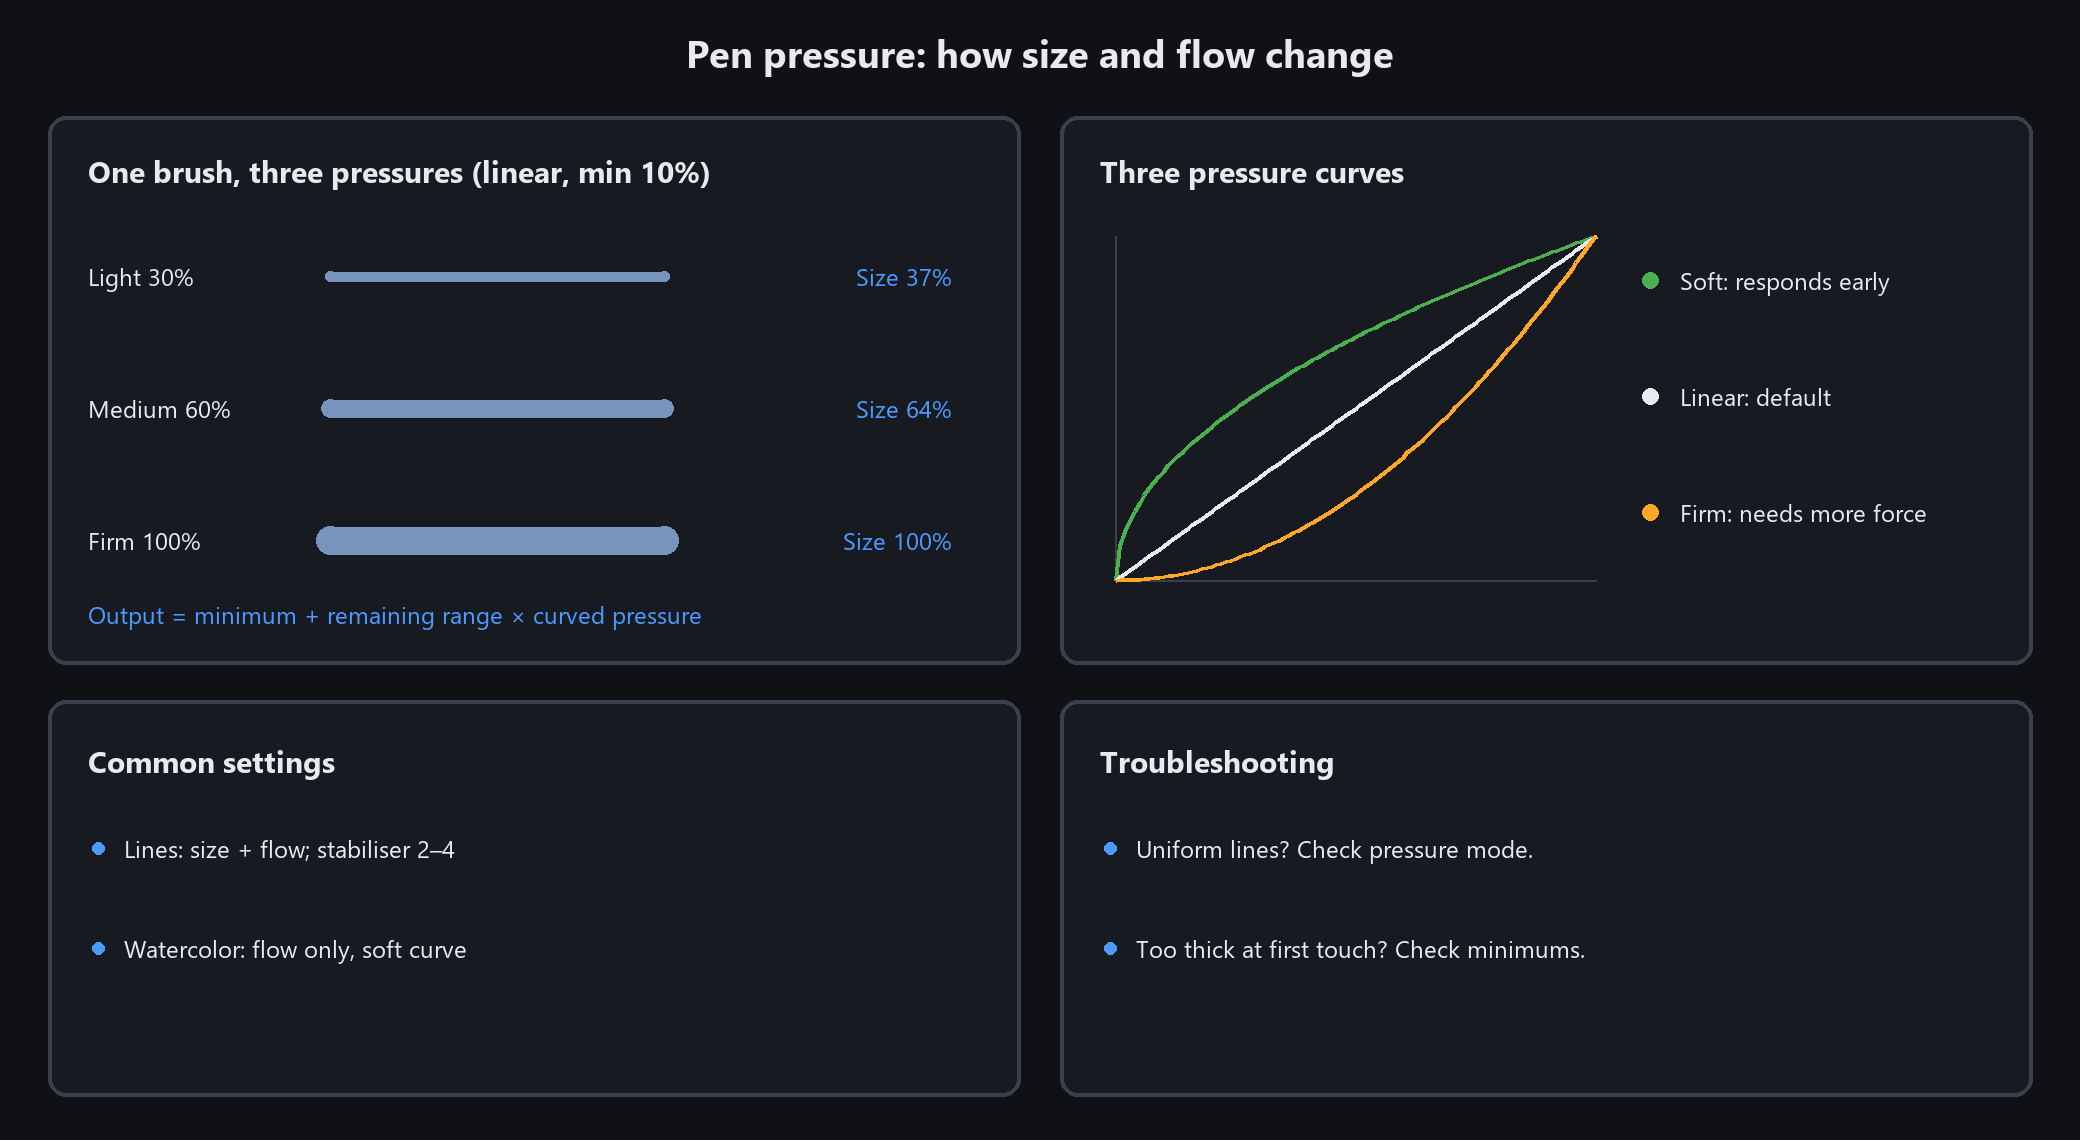
actual amount = min% + (100 − min%) x curved pressure.
Raise min size to 50 and the width difference between light and heavy strokes halves —
pressure will feel like it "does nothing".
Choosing a curve
Soft (square root): light pressure already shows. Calligraphy, watercolour, sketching
Linear: what you press is what you get. The default
Firm (squared): takes real pressure to show. Crisp linework, for a heavy hand
Common pairings
Writing and lines: both width and flow, min size 5~10, stabiliser 2~4
Laying colour: flow only, min flow 20~30, soft curve, stabiliser 3~5
Uniform-width lines → pressure mode was switched off. Everything pitch black at a touch → minimums set too low.
Above 5 the stabiliser visibly lags; drop to 0~2 for fast hatching
No pressure or wrong pressure: three checks
Check in this order
1. The toolbar group never appeared → the pen has not been detected yet. Tap the canvas with the nib
2. The group is there but pressure does nothing → click the pen icon; is pressure mode set to "off"?
3. Try another brush → textured and pattern brushes have fixed strokes; pressure only changes how much ink lands. The plain paint brush or an inking brush shows pressure most clearly
Still nothing
Check the tablet driver: some drivers can exclude individual programs from pressure
Confirm in Windows settings that pen input works at all (tapping, handwriting)
Mouse strokes always use full pressure. That is expected: no pressure signal means maximum
To verify pressure works: stabiliser 0, linear curve, slowly draw a stroke from light to heavy —
it should thin out to thick. If the width never changes, pressure is not getting through