Feature 3 · The brushes
8 topics from the in-app manual.
Dozens of brushes: how to find one fast
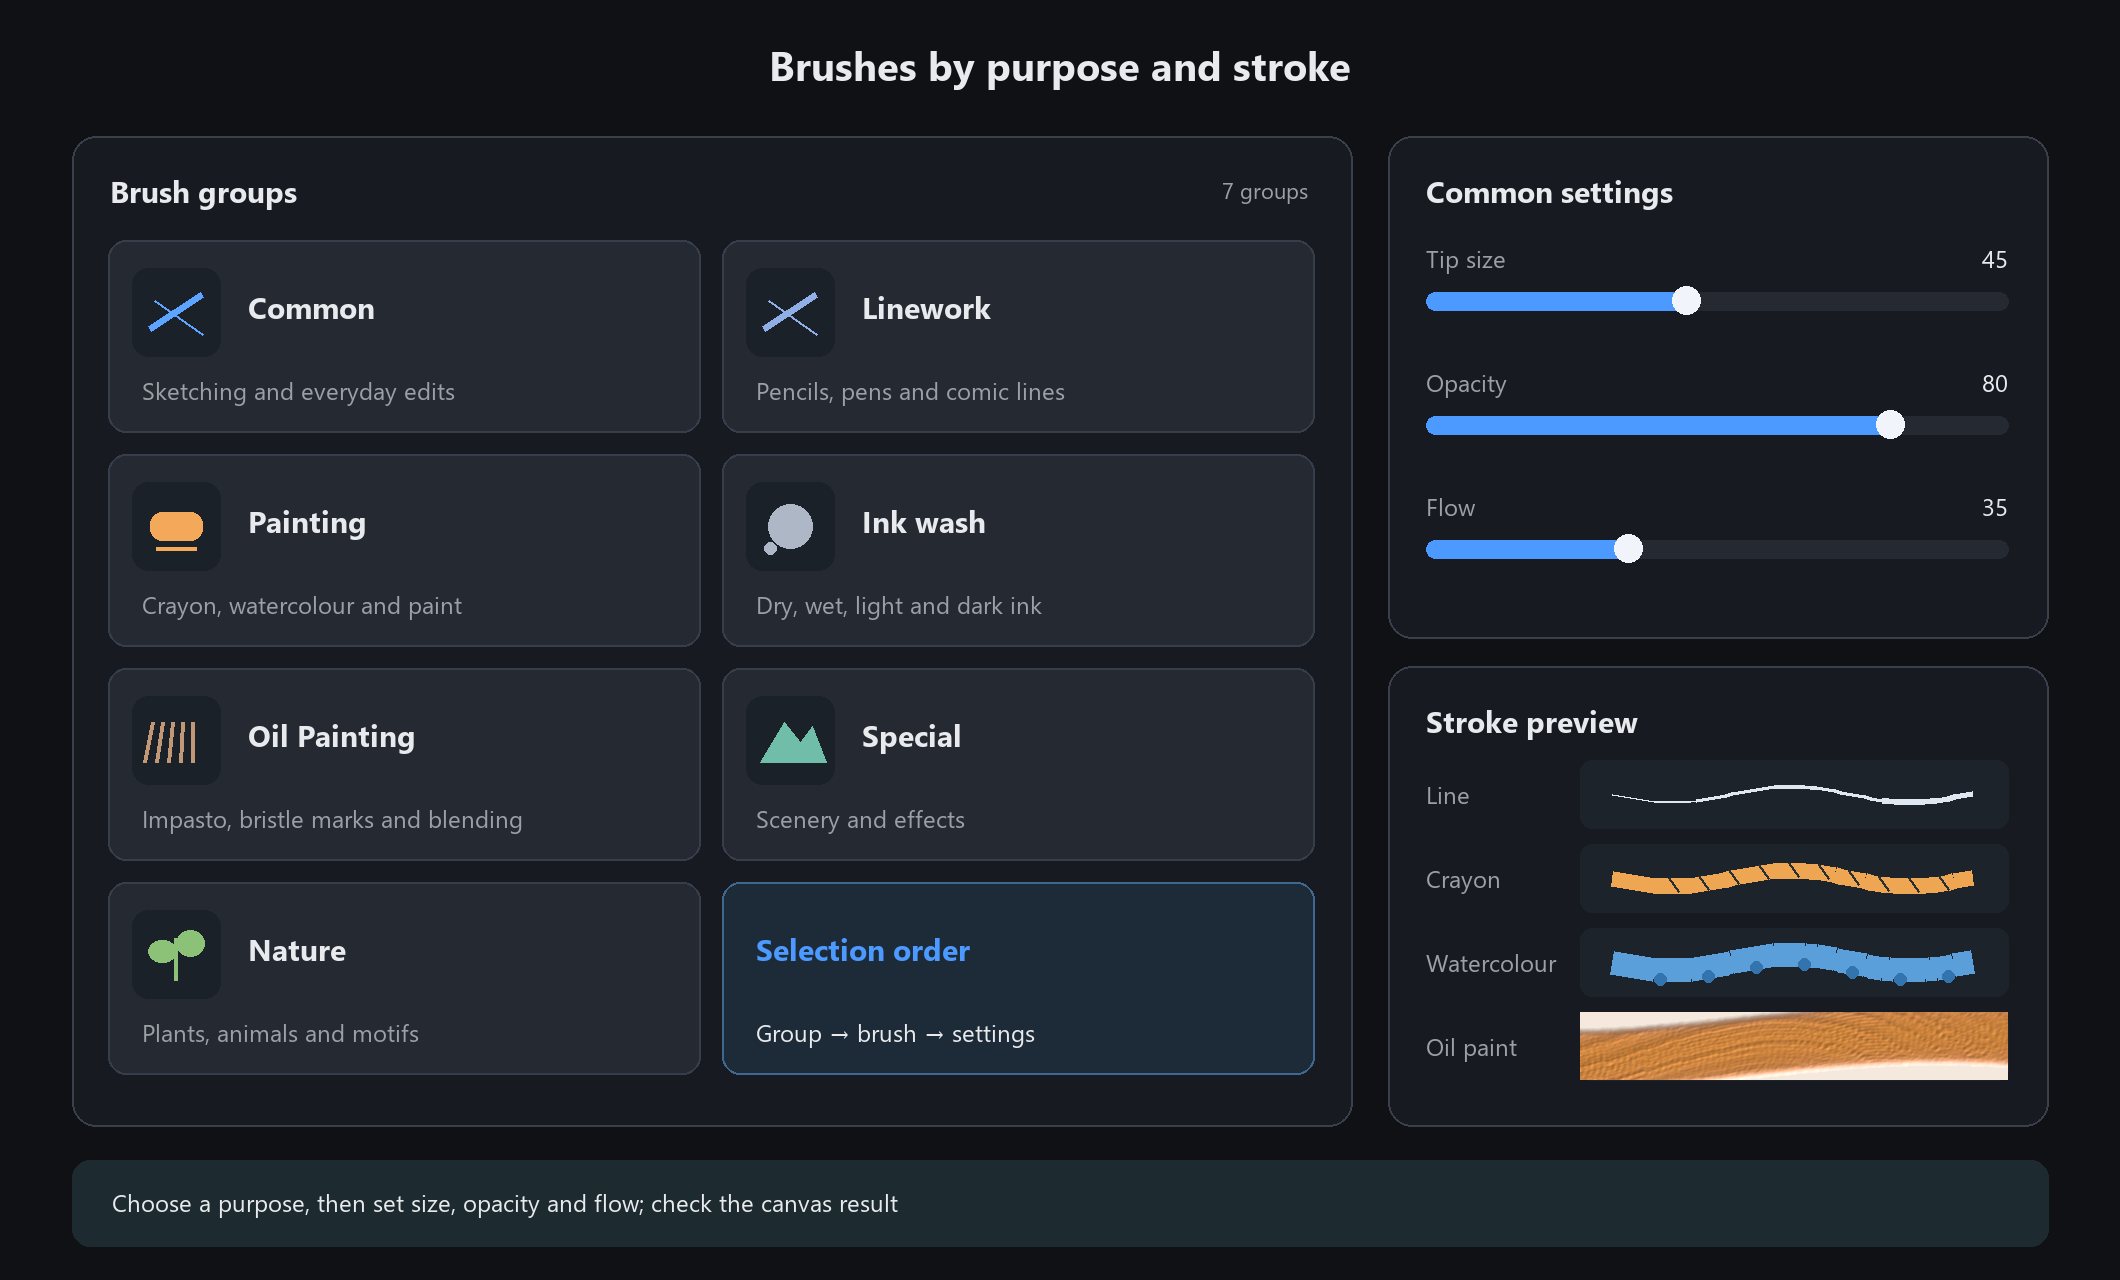
Brushes are grouped by temperament
Open the brush panel and you will see them sorted by purpose: common, inking, impasto,
ink-wash, oil painting, special, nature. Decide what you are doing first, then go to that group.
Three universal knobs
Tip size: almost every brush has it. Small for detail, large for laying in colour
Opacity: low lets colours build up; high covers strongly
Flow: how much "paint" comes out per stroke. Low flow is for gradual build-up
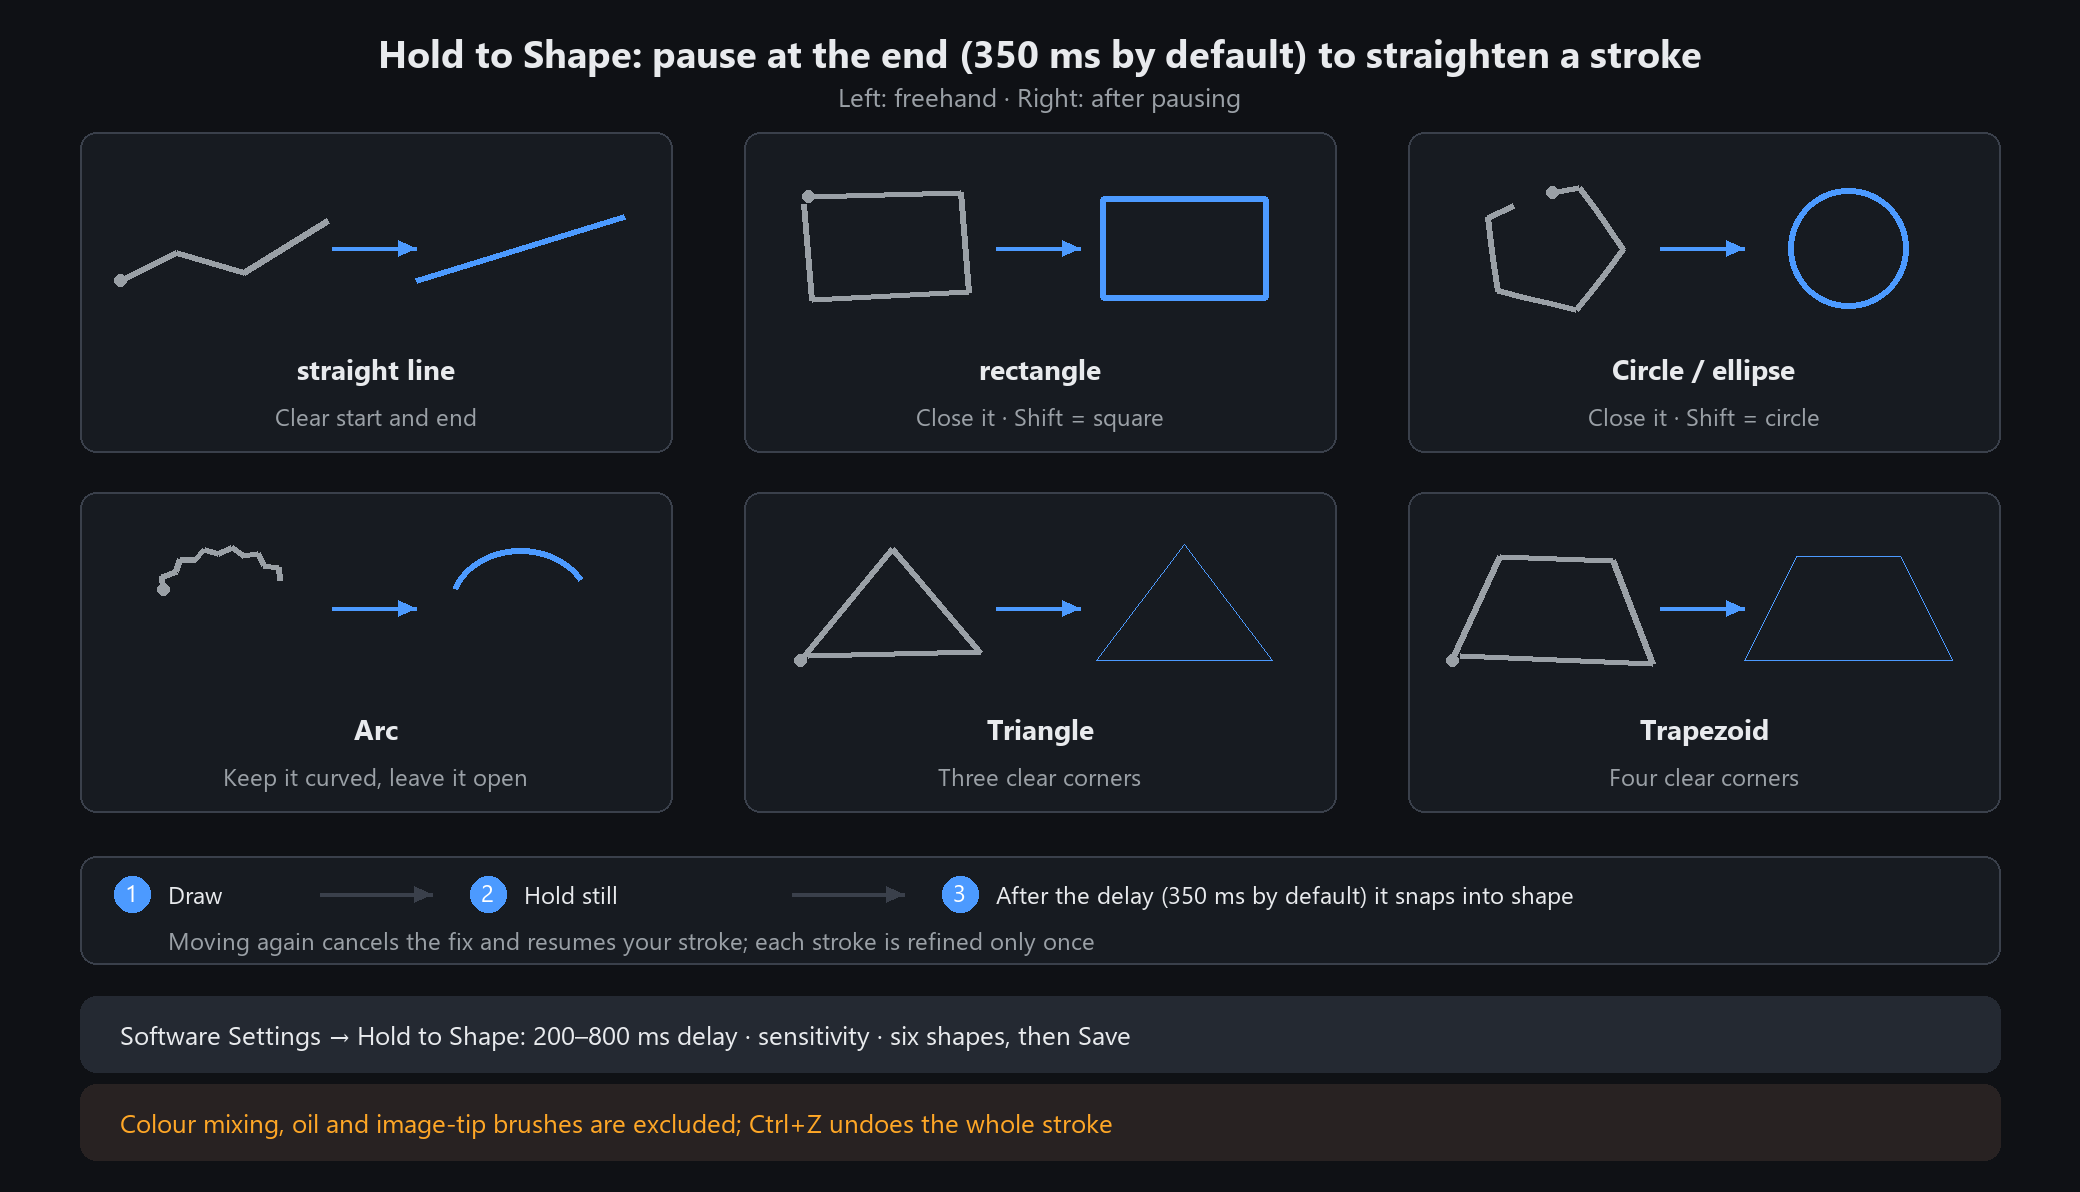
Hold to refine a shape
With a regular paint brush, pen, pixel brush or vector brush, draw a line, circle, rectangle, triangle, trapezoid or arc and hold the tip still without lifting it. After 350 ms, a recognized stroke becomes a clean shape. Hold Shift for a circle or square. Moving again restores the original stroke; lifting the tip ends recognition.
In Software Settings → Hold to Shape, you can turn this on or off, set a 200–800 ms delay and recognition sensitivity, and choose among six shape types.
Not sure which one? Start in the common group. Those are safe all-rounders that never look weird
Pixel brushes vs vector brushes: know the difference
The one-line difference
A pixel brush lays down colour — it changes the pixels of the layer. A vector brush lays
down a string of draggable points you can edit any time.
Pixel brushes (the brush group in the toolbar)
Several kinds — paint, soft, spray, pixel, ink-wash — plus two erasers
Rich texture and tonal strokes; but they are pixels, so zooming degrades them
Good for: colouring, laying down paint, anything that needs "feel"
Vector brushes (shortcut B, right after the brush tool)
Only two: vector brush and vector highlighter (fixed translucency, auto-thickened line)
Stored as points and curves; edges stay crisp at 1000x zoom
After drawing, click it with the direct-selection tool: add nodes, bend curvature, change width and colour — never blurry
Vector-only options: 7 line styles (dashes and dots), end arrow, tapered tail
Annotations, circling things, sketching diagrams → vector brush. Painting and retouching → pixel brush.
Pixel strokes can be rescued too: click one with the direct-selection tool and a slim stroke converts into a vector curve
Inking group: sketching and line work
The pencil family
From fine sketch pencil up to 6B — the higher the number, the darker and softer. Sketch with 2B to 4B; HB is light, good for under-drawing.
Hard pens
Iridium fountain pen: even lines, good for tidy outlines
Comic G pen: thickness follows speed. This is the standard comic nib
Ballpoint, soft dip pen: a handwriting feel, good for quick sketches
Charcoal
Hard charcoal for blocking shapes, soft charcoal for big tones. Lift highlights afterwards with the soft eraser.
Do not sketch with too black a pencil or it will not erase cleanly. Start at 2B
Impasto group: crayons and watercolour
Four crayons, four tempers
Oil crayon: thick wax, strong coverage. Good for the chunky colour blocks of children's illustration
Dry crayon: paper texture shows through, sandy result. Good for surface grain
Blending crayon: actively mixes with what is underneath. The natural choice for gradients and transitions
Staining crayon: a thin tint only. It tints without wiping out the shading below
The watercolour family
Light / pale / medium / dense are four steps from thin to thick. Medium is the everyday one.
Wet-in-wet bleeds colour outward — effortless for mist and background texture.
Floating colour reproduces the look of pigment settling with a darker rim at the edge.
The blending brush pushes around paint that is already down, like a brush loaded with clean water.
Press hard and crayon fills the paper grain; press lightly and it only catches the surface. Same brush, two looks
Ink group: calligraphy and freehand
Pale / dense / ink brush: three ink densities, the workhorses of freehand painting
Sharp-tip ink: a fine point with crisp turns. Orchid leaves, bamboo
Springy writing: a resilient feel, good for everyday lettering
Running-script dense ink: saturated and responsive, holds together when written fast. For cursive
Flat calligraphy tip: a flat head that gives square strokes at once. Clerical and stele scripts
Dry flying-white: the scratchy look of a nearly empty brush. Only reads well against dense ink
Wet wash ink: a big wet brush for distant mountains and shadows
Flying-white alone tends to look dirty. Lay dense ink first, then sweep the edges with flying-white for depth
Special group: landscape elements in one stroke
Brushes here draw whole clusters at once instead of one shape at a time:
River: drag a line and a river with flow direction grows along it
Sea and lake: wider and calmer than the river. For laying water surfaces
Distant mountains: one drag produces a ridge line with receding tones
Houses: 23 buildings (realistic brick, watercolour Jiangnan, fine-line heritage, ink freehand, anime townhouse), drawn in three-quarter view
Ground: 16 side-view strata and 11 top-down surfaces, to sit plants and trees on
Lightning: four storms (bolt, branching fork, sheet flash, violet storm)
Cloud / smoke: click for one puff, drag for a continuous bank
Flame: click for a fire, drag for a line of fire, with sparks
Starry sky, heavy rain, snow, fireworks: all click-to-scatter, drag-to-spread
Hair: light pressure for tips, heavy for roots. Character hair and animal fur
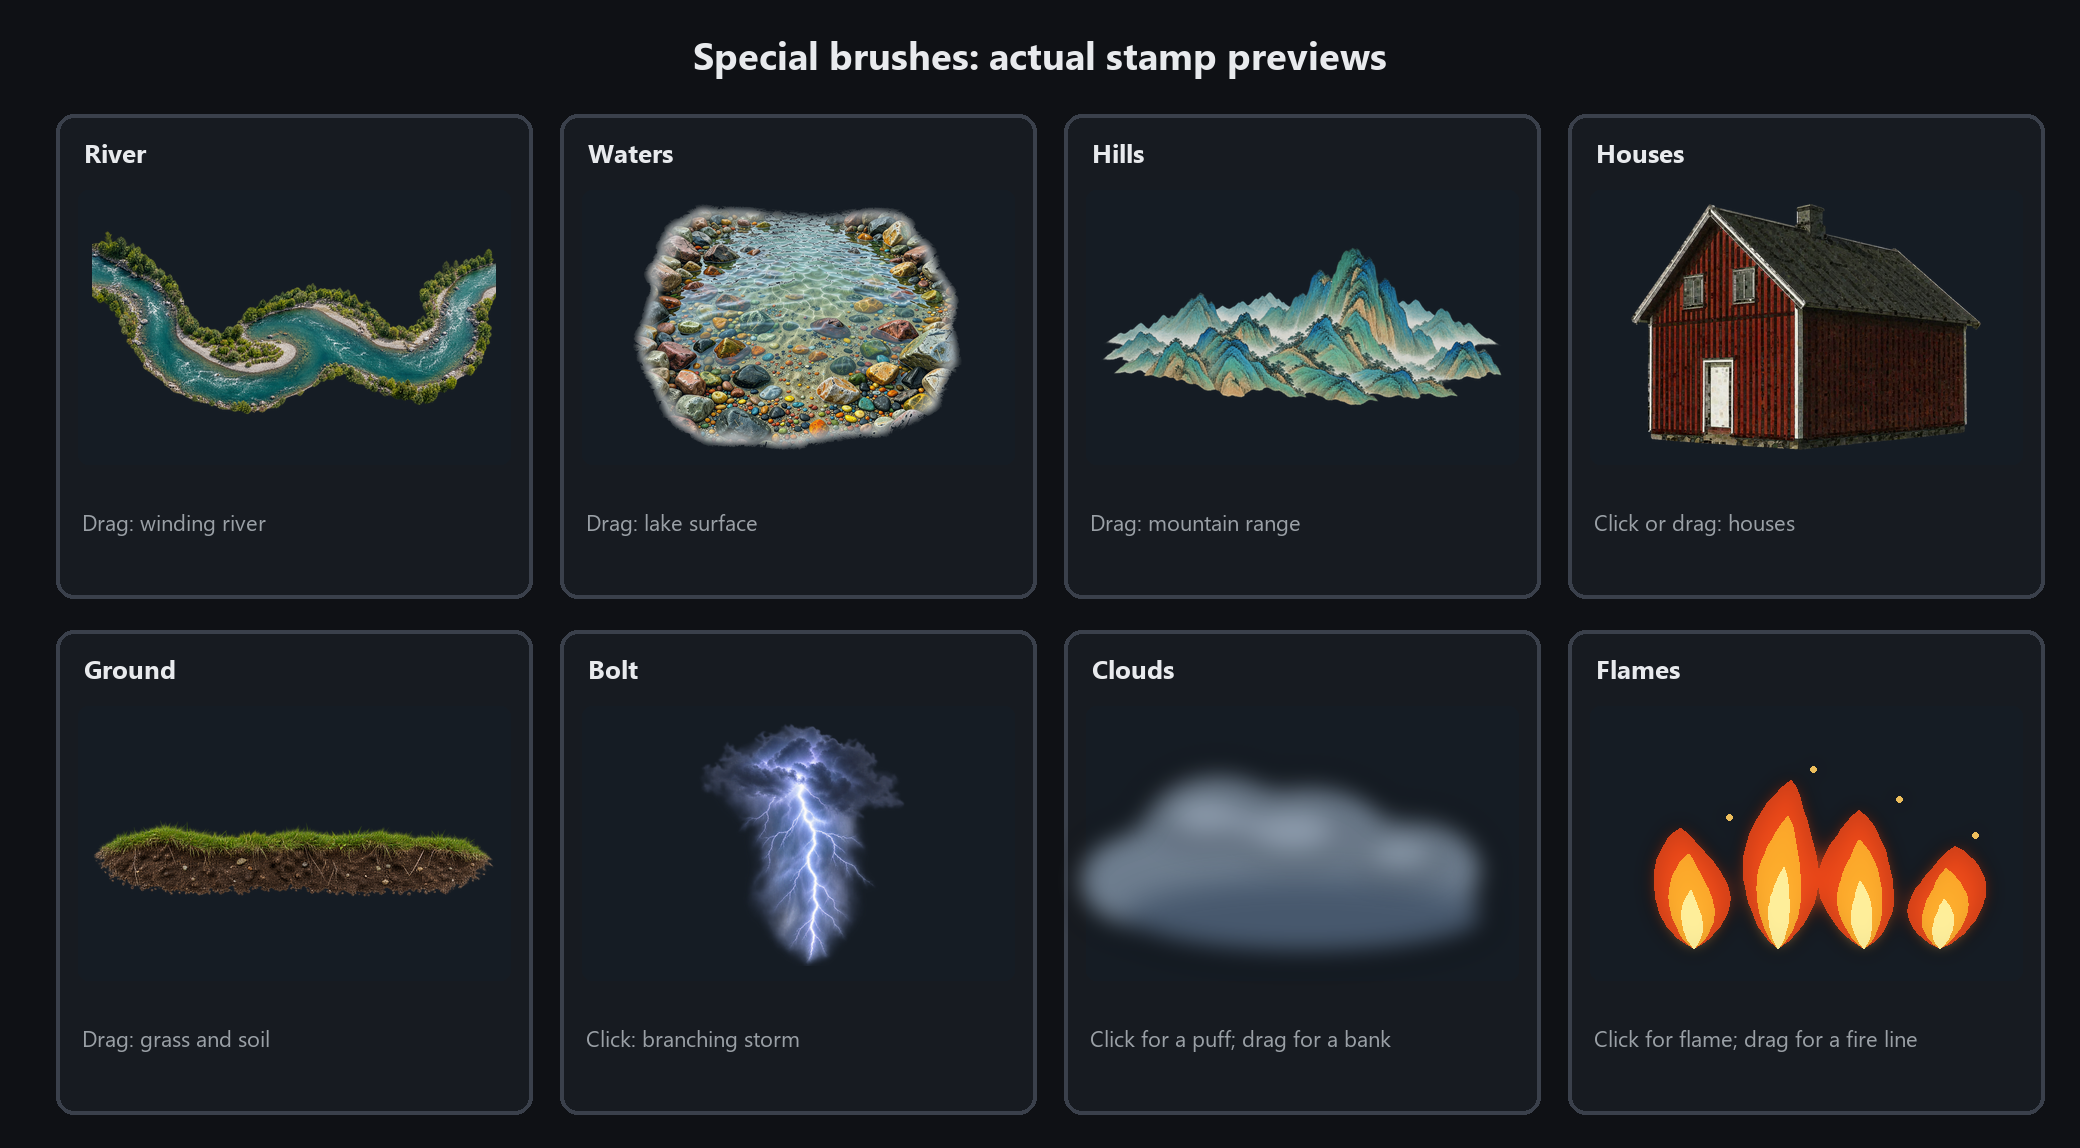
These brushes are for laying in broad relationships before adding detail. Do not expect one brush to produce a whole picture
Nature group: realistic asset brushes
This group is stamp brushes drawn from real assets — one click drops a whole plant or animal:
Plants
Grass: twelve grass types plus wild flowers growing together. Density, scale, flower amount and dryness are adjustable
Scattered leaves, petals: for falling-leaf effects
Rose, chrysanthemum, sunflower, lotus, bamboo: whole plants or blooms, placed in one click
Tree: 24 variants across realistic seasons, anime seasons, ink and watercolour. Size is free
Dandelion, four-leaf clover: small accents
Animals
Butterfly, dragonfly: wings with translucency
Goldfish, small fish, shrimp: small aquatic life
Shell: beaches, still life
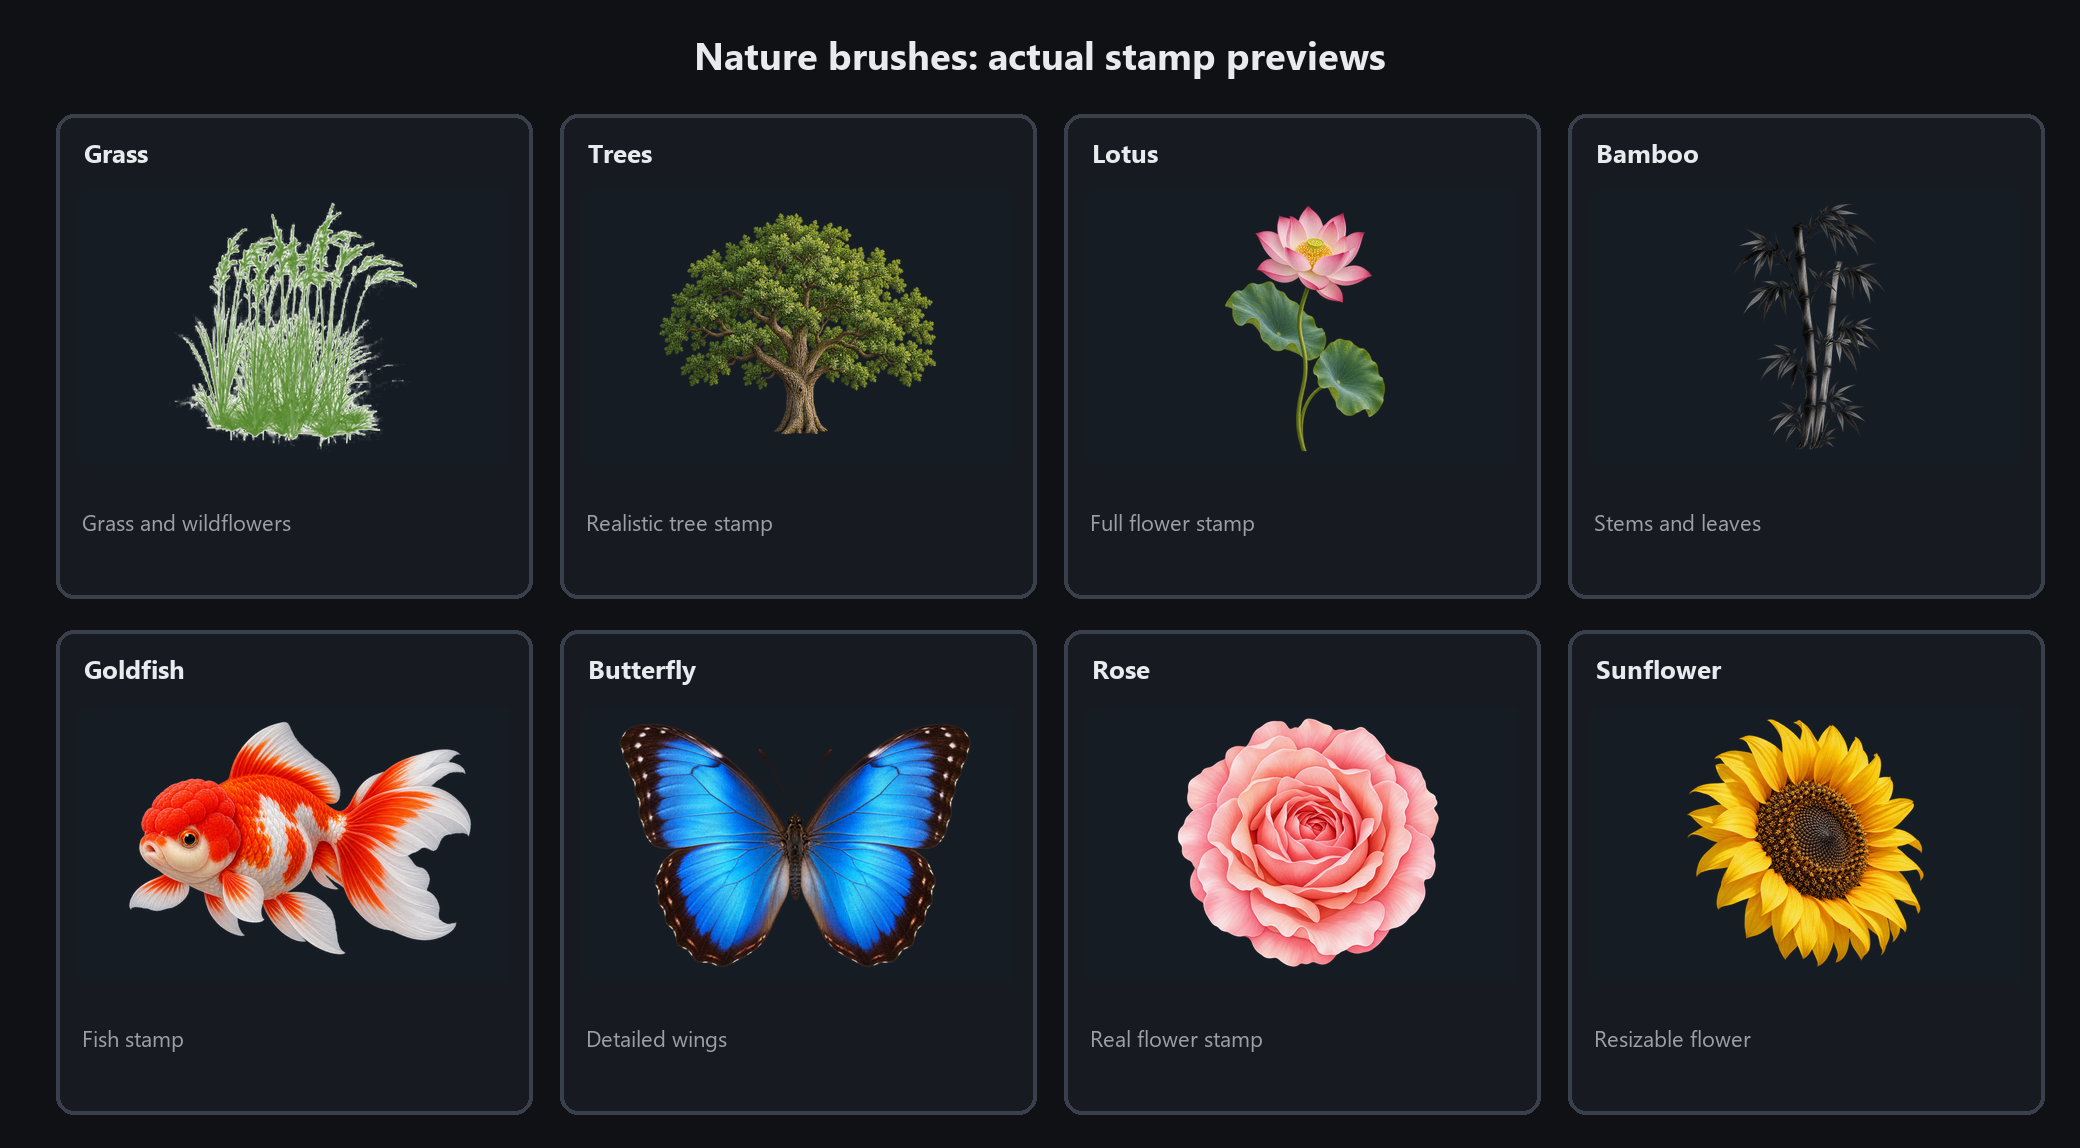
These brushes keep the asset's own colour and shading; the foreground colour does not tint them. To recolour, add a layer and use a colour overlay instead
Keep randomisation on when painting grass — each stroke then differs, which avoids a copy-paste look
Oil painting brushes and other special brushes
Oil painting brushes
Oil brush: an all-round colour brush. Bristle marks follow the stroke; light pressure picks up under-colour, firm pressure deposits fresh paint
Flat brush: square head, the fastest way to lay a large base colour
Filbert: pointed on one side, round on the other. Covers area and finishes edges
Dry bristle: exposes canvas grain when lightly loaded. Rough surfaces and light sweeps
Wet bristle blender: pushes boundaries apart. For transitions
Paint Buildup controls coverage and pigment height; Color Pickup controls mixing. Bristle Density and Detail shape the grooves. Medium Dilution preserves the loaded impasto at 0%; raising it makes paint more translucent with softer edges and less height gain for thin glazes.
Each oil stroke becomes a selectable object with its own pigment height. Use the selection tool to move, resize or rotate it. Changing brush width reshapes both pigment and relief; the colour controls can recolour it. Side lighting follows the raised bristle grooves. Dry bristles leave a thinner deposit. WCI projects keep the height data; ordinary image exports show the lit, flat appearance.
Others worth knowing
Splatter: flung paint specks
Wobbly: lines with a built-in hand-drawn tremor. Good for sketch-style diagrams
Rainbow: hue shifts along the stroke. Children's illustration, decorative lines
Dry sweep: almost no paint, dragged across. Highlights and wear
Pointillist: dense small dots for a pointillist look
Marker, impasto: opaque coverage for flat colour blocks
Dry sweep works best with a light colour over a dark surface. The other way round just smears