Getting started
3 topics from the in-app manual.
Open one of your own photos first
File → Open…: JPG / PNG / WEBP / BMP, multi-select supported
File → New…: width and height, unit (px / cm), resolution and background
Going to print: centimeters and 300 DPI. Staying on screen: pixels and 96 DPI
Start with an image around 2000 px: brushes and zoom stay snappy. Huge canvases slow everything down
Two ways to save: exported JPG/PNG has layers merged; the .wci project keeps layers so you can keep editing tomorrow
Practise on your own photo, not a sample. Every change stays visible, and that is the fastest way to learn
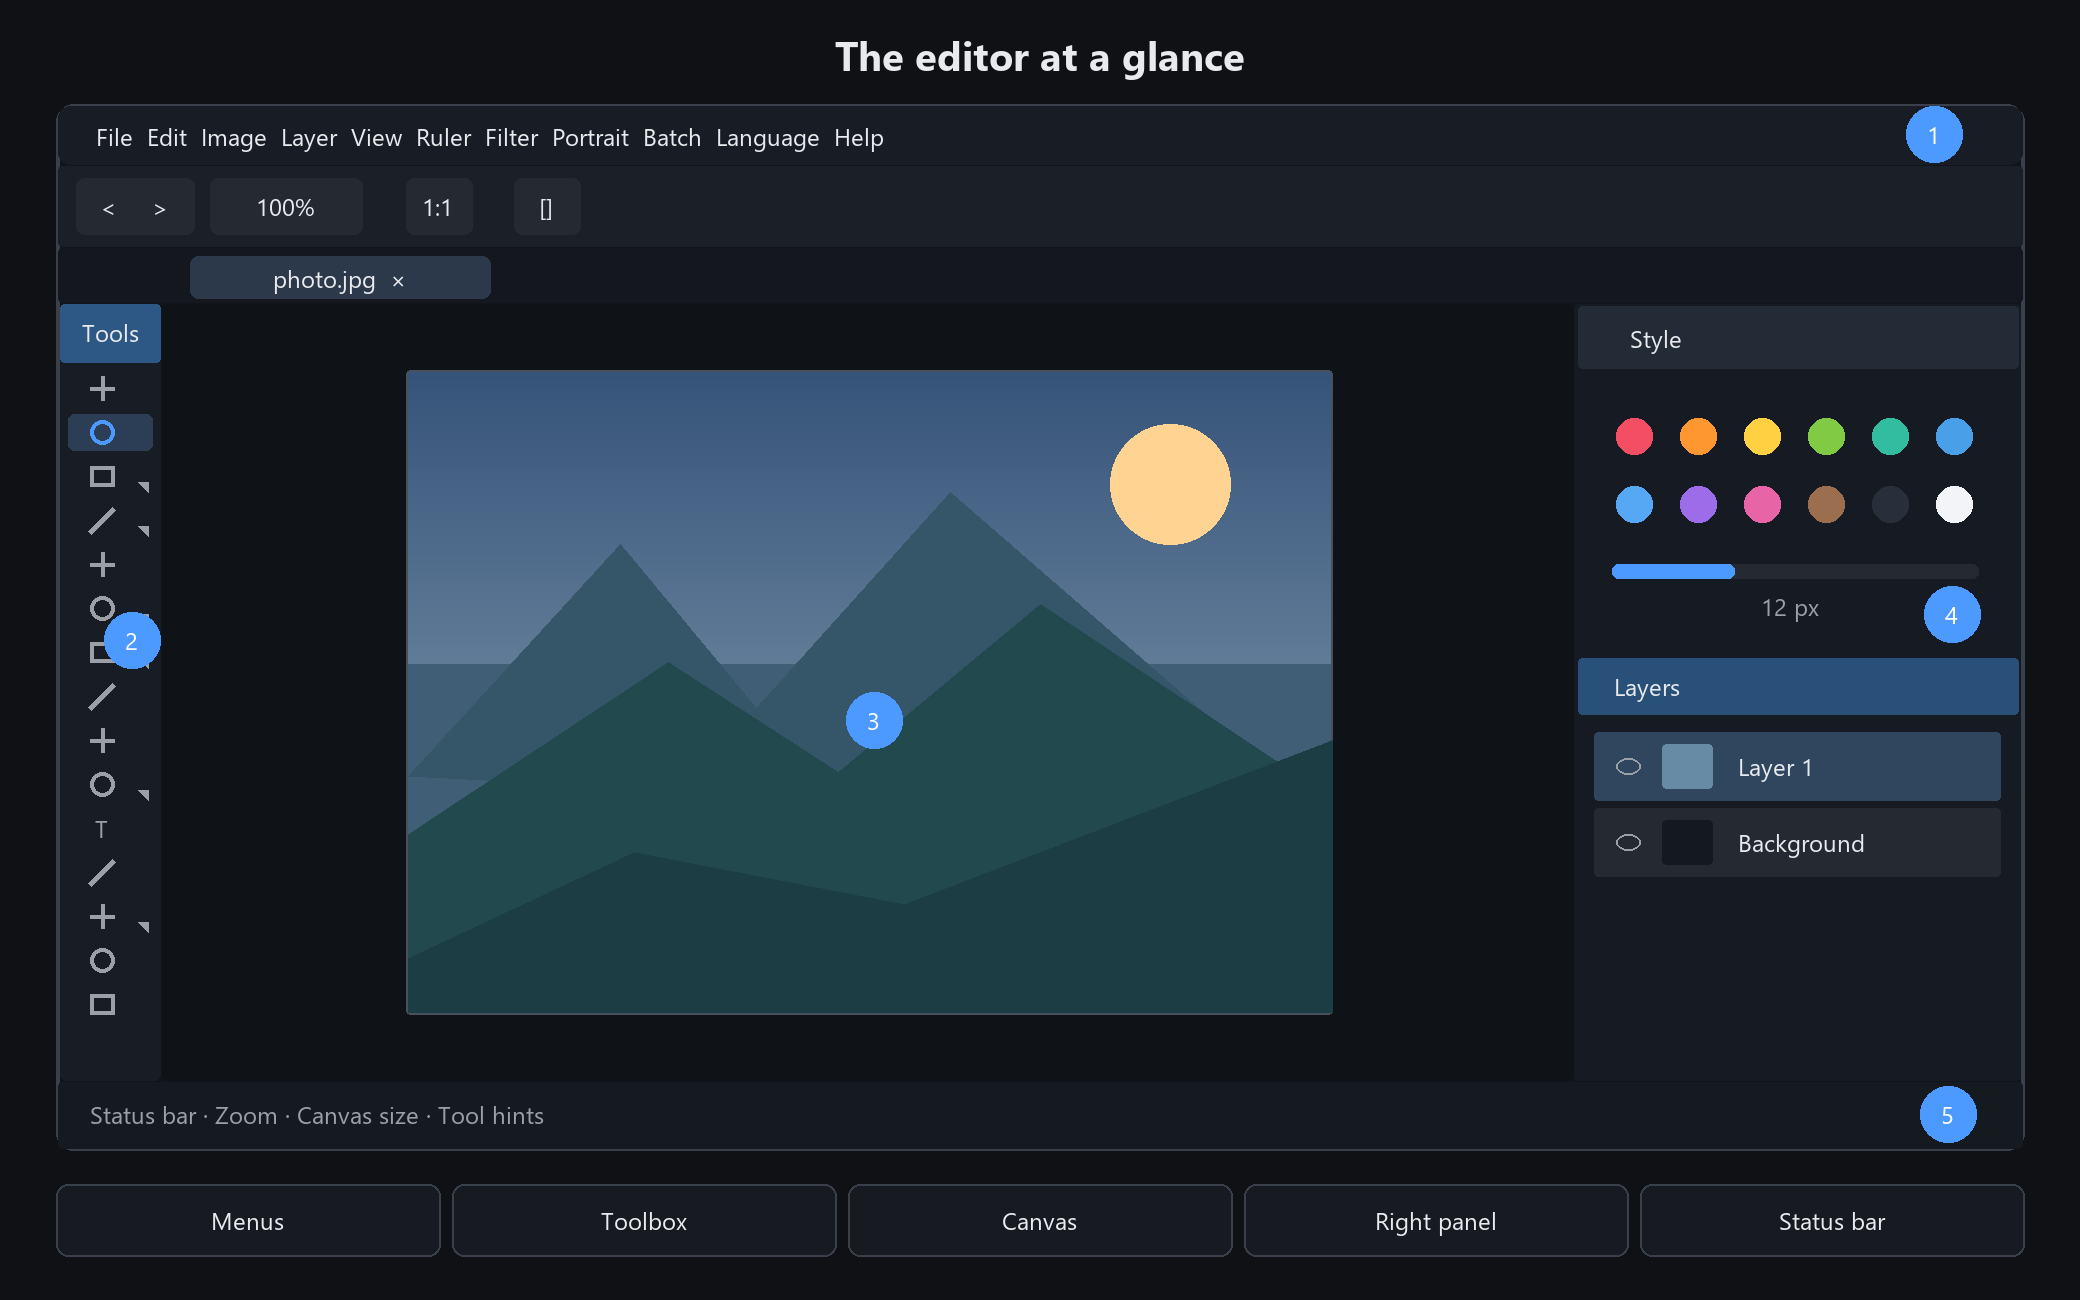
Five areas, each with one job
Top menu bar: 11 menus; the row below holds Undo, zoom and Fit to Window. Hover over the zoom percentage to reveal a vertical slider below; drag upward to zoom in, and move away to collapse it
Left toolbox: brushes, selection and retouch tools. Press and hold any button with a small triangle to open its sibling tools
Center canvas: wheel zooms around the cursor; hold Space and drag to pan
Right panels: active tool settings above, layer list below
Bottom status bar: zoom level, canvas size, and a one-line hint for the current tool
When stuck, glance at the status bar. It keeps telling you what the current tool does
When you mess up
Ctrl+Z Undo. Keep pressing to step back a long way
Ctrl+Y Redo, when you undo too far
Parameterised changes such as portrait and filters land on their own layer, so you can go back and retune them
Experiment freely. Almost everything can be undone. The only thing you cannot undo is closing the app without saving