Feature 1 · A/B brushes
6 topics from the in-app manual.
What the A/B brushes actually do
In one line
Brush A decides where to copy from. Brush B decides where to paint it.
The problem it solves
Something in the photo is damaged — mould on an old print, a blemish, a stranger in the background, power lines.
You do not want to smear the whole area, just cover it with intact pixels from nearby. That is this tool's job.
How it differs from a normal brush
A normal brush paints the colour you picked. The A/B brushes paint real pixels that already exist elsewhere in the image,
so the texture, shading and grain match the surroundings instead of leaving a flat patch.
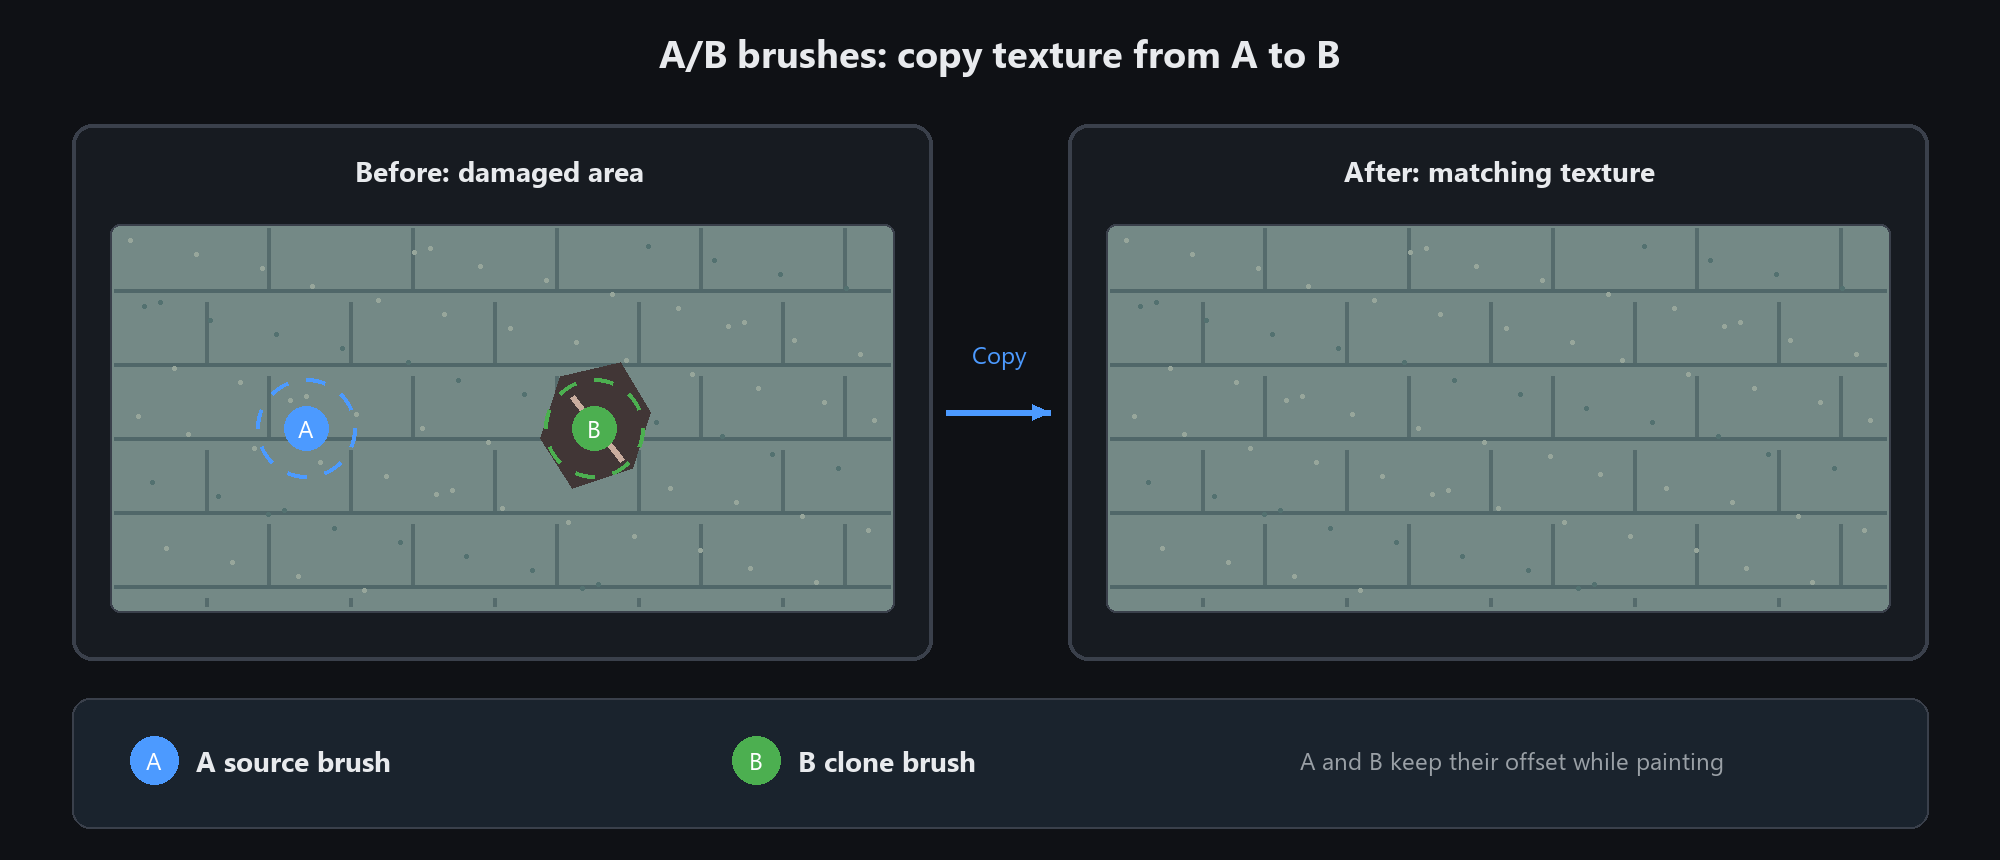
How it differs from a clone stamp
A typical clone stamp samples a small patch and works only inside the current image.
The A brushes snapshot the entire image, and that snapshot is decoupled from the document —
so the tool clones across documents out of the box: sample in image A, switch tabs, repair in image B.
See the dedicated topic "Cross-document cloning" below.
Remember it as: A is the source, B is the target. A only remembers, B only paints
A/B brushes in three steps
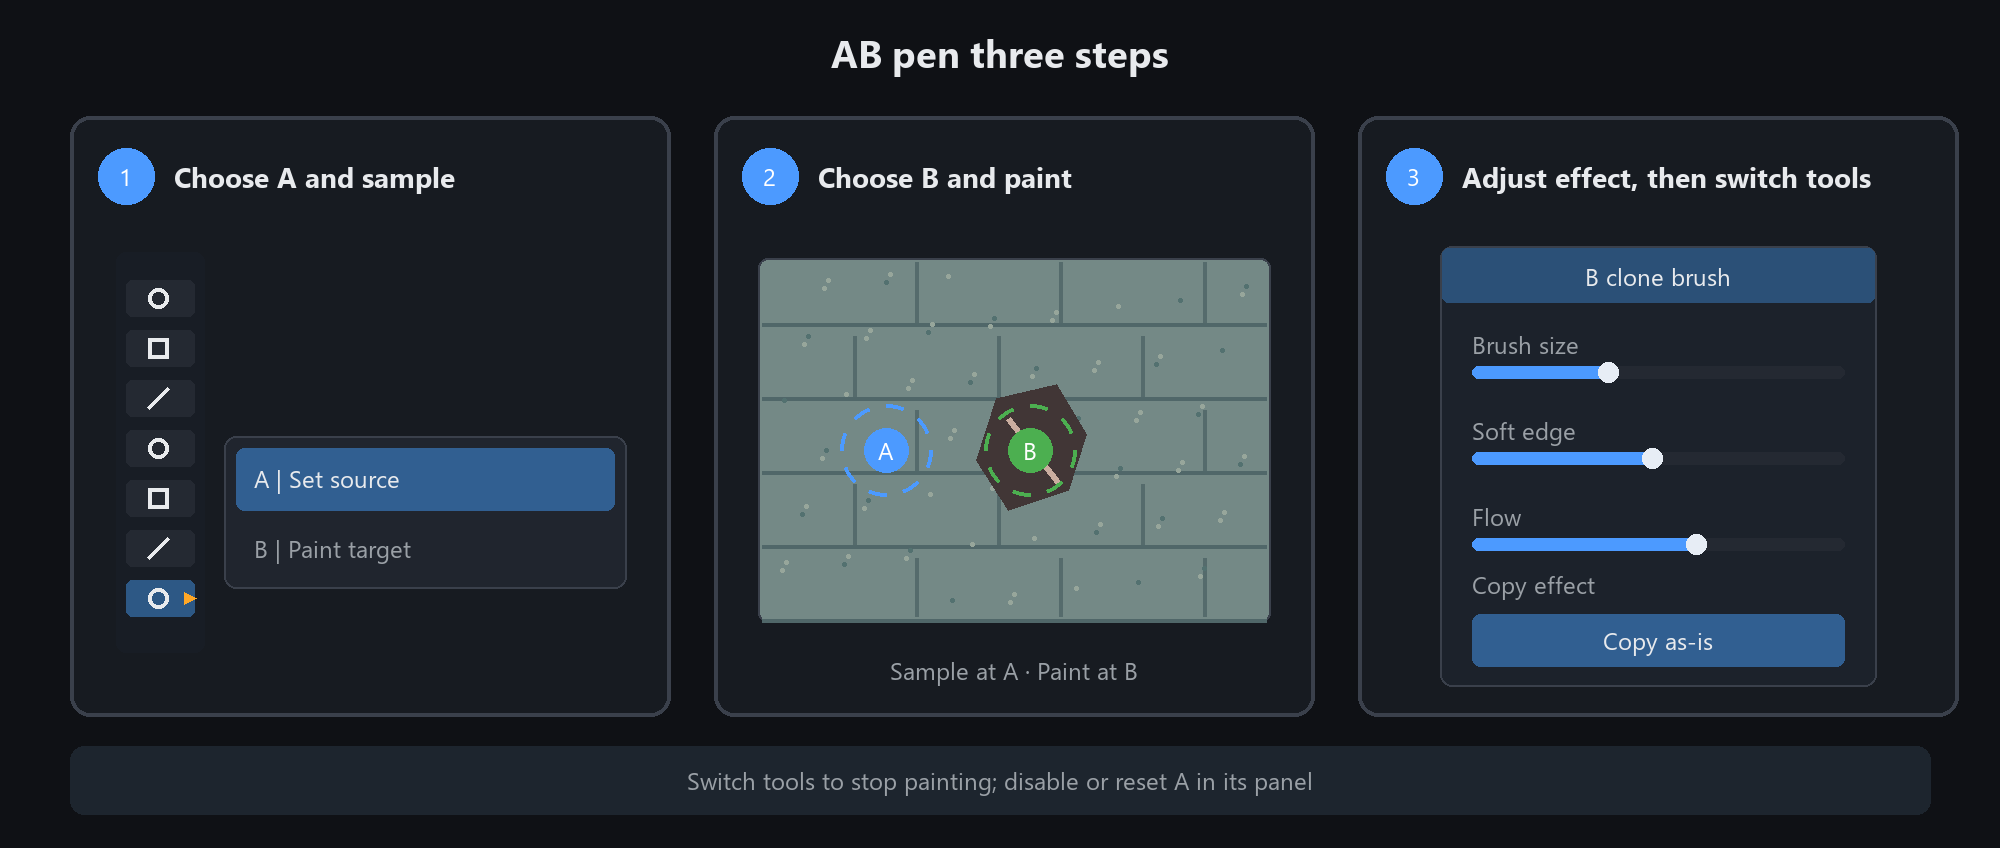
Step 1: pick brush A and click a source point
In the left toolbox, find the clone group, hold the small triangle and choose A source brush.
Move the cursor over an intact area whose texture resembles the damaged one, and click.
A dashed circle appears on the canvas — that is your source point.
Step 2: switch to B and paint over the damage
Switch to B clone brush and drag across the damaged area. The source point moves along with you —
the two are locked together: wherever A travels, B fills in.
Step 3: adjust and finish
The B brush's style panel controls brush size, soft edge, flow and copy effect. Switch to another tool when the repair is done.
The A source point remains available; switch back to A to disable or reset it in the style panel.
Wrong source point? No need to start over: hold Ctrl and click again to reset A in place (this clears the old B target)
You do not have to finish in one stroke. B remembers its target, so you can build it up over many strokes
Cross-document cloning
How it works
When brush A samples, the app snapshots the entire image into memory, decoupled from the document.
So you can: sample a clean sky in photo A with brush A → click another tab →
repair photo B with brush B using A's pixels. The two documents stay independent;
B paints onto the currently selected layer of the target document.
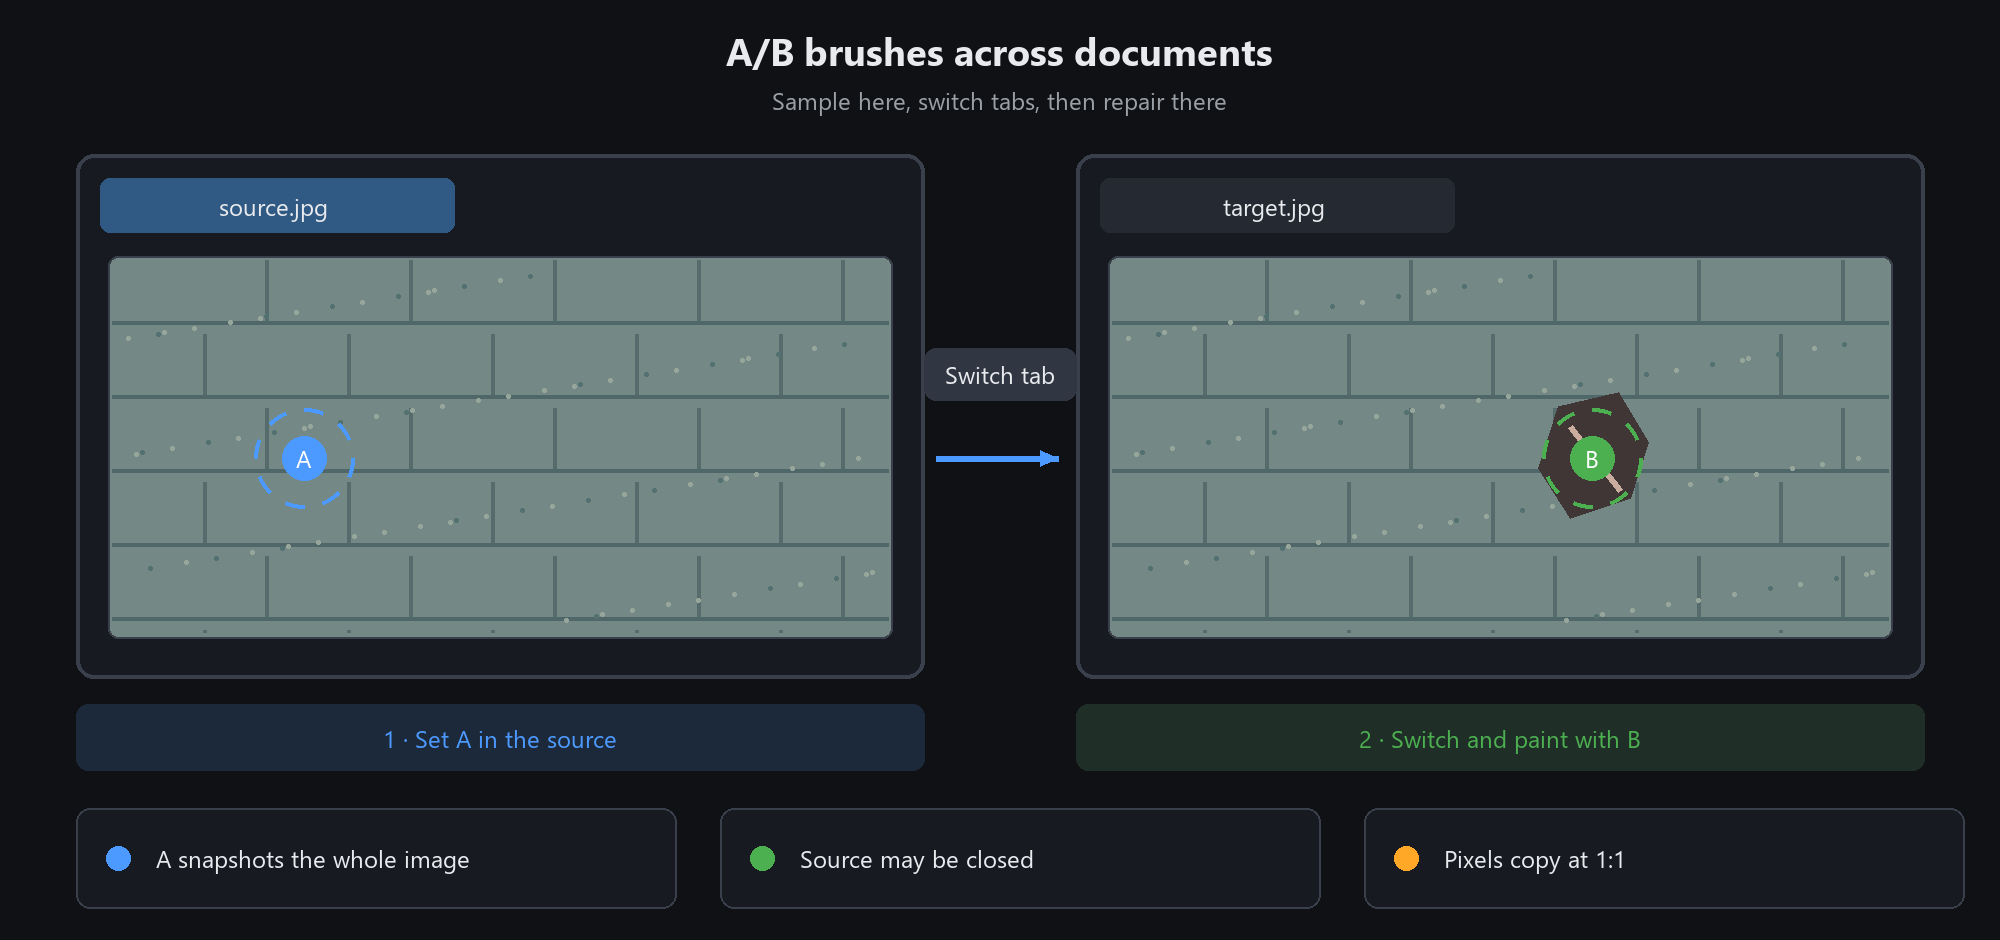
Three things a traditional stamp cannot do
The source can be closed: the snapshot lives in memory, so closing the source file never interrupts the repair
Different sizes are fine: pixels are carried over 1:1 with no auto-scaling;
a texture sampled from a small image lands at its native size on a large canvas — sample a bigger region if you need more
The A circle disappears on the target: A only shows on its source image. That is normal — the sample is still active
The setting that matters across documents
Different tone between images makes a raw copy look like a patch. The B panel offers five copy effects:
Copy as-is: raw pixels. Fine for repairs inside the same image
Colour match: keeps the source texture but pulls brightness and tone toward the target. First choice across documents
Texture only: carries just the texture variation; the base colour comes entirely from the target. Most natural for materials
Soft blend / Dimmed copy: makes the patch less visible; tune strength with "Effect strength"
Typical uses: carry a repaired area from photo A into photo B, move real texture from a source image onto your work,
or align repairs between an old and a new version. None of these work with a traditional clone stamp
Where you sample decides whether it works
Three rules of thumb
Stay close: the nearer the source, the closer the light and tone, and the less visible the seam
Match the material: sample skin for skin, sky for sky. Never patch a face with wall texture
Avoid edges: never park the source on a light/shadow boundary — dragging will smear that boundary along with it
Common failures
A ghost outline appears → the source slipped mid-stroke. Ctrl+click to reset A and redo
The patch looks grey → you sampled inside a shadow. Pick a spot with similar brightness
It gets messier as you go → brush too large. Shrink the tip slightly below the size of the damage
Only one test matters: step back and look. If you cannot spot the repair at a glance, it worked
Clone repair inside the photo-repair panel
Portrait → Photo restore. The panel has three tabs: damage repair / clone repair / dust removal
Clone repair is a dedicated entry point to the same A/B brushes, used exactly as in the toolbox
Its advantage is sitting next to AI repair: fix small flaws by hand with A/B, let AI handle large damage
Three buttons on the panel: click an intact area to set A → paint B from A → finish cloning
Work in this order: remove dust first, then AI-fill large holes, then tidy small spots with A/B. Reverse the order and you redo work
Removing things you do not want
Blemishes and spots
Sample A on clean skin right next to the spot, then dab with B. Dab, do not drag.
Strangers, wires
These targets are thin and long. Set the tip slightly wider than the target and drag it in one stroke, without releasing.
A second stroke after releasing usually leaves repeated texture at the seam.
Watermarks
Do not just paint over a semi-transparent watermark. Check what it sits on, sample from that same background, then lower opacity a little
Rather not do it by hand? Two automatic helpers
Inside the eraser group (hold the small triangle) hide two "you smear, it repairs" tools:
Smart speck eraser: for 1~5 px specks and thin lines; large intact areas are never touched
Smart repair: paint over large stains, strangers or watermarks, release, and AI fills it in
Full walkthrough and slider tuning live in the "Feature 6 · Smart repair" chapter. Do not mix them up:
specks and lines → speck eraser; large objects → repair; small areas where texture matters → A/B brushes