Layers
4 topics from the in-app manual.
What layers are and why to use them
A comparison
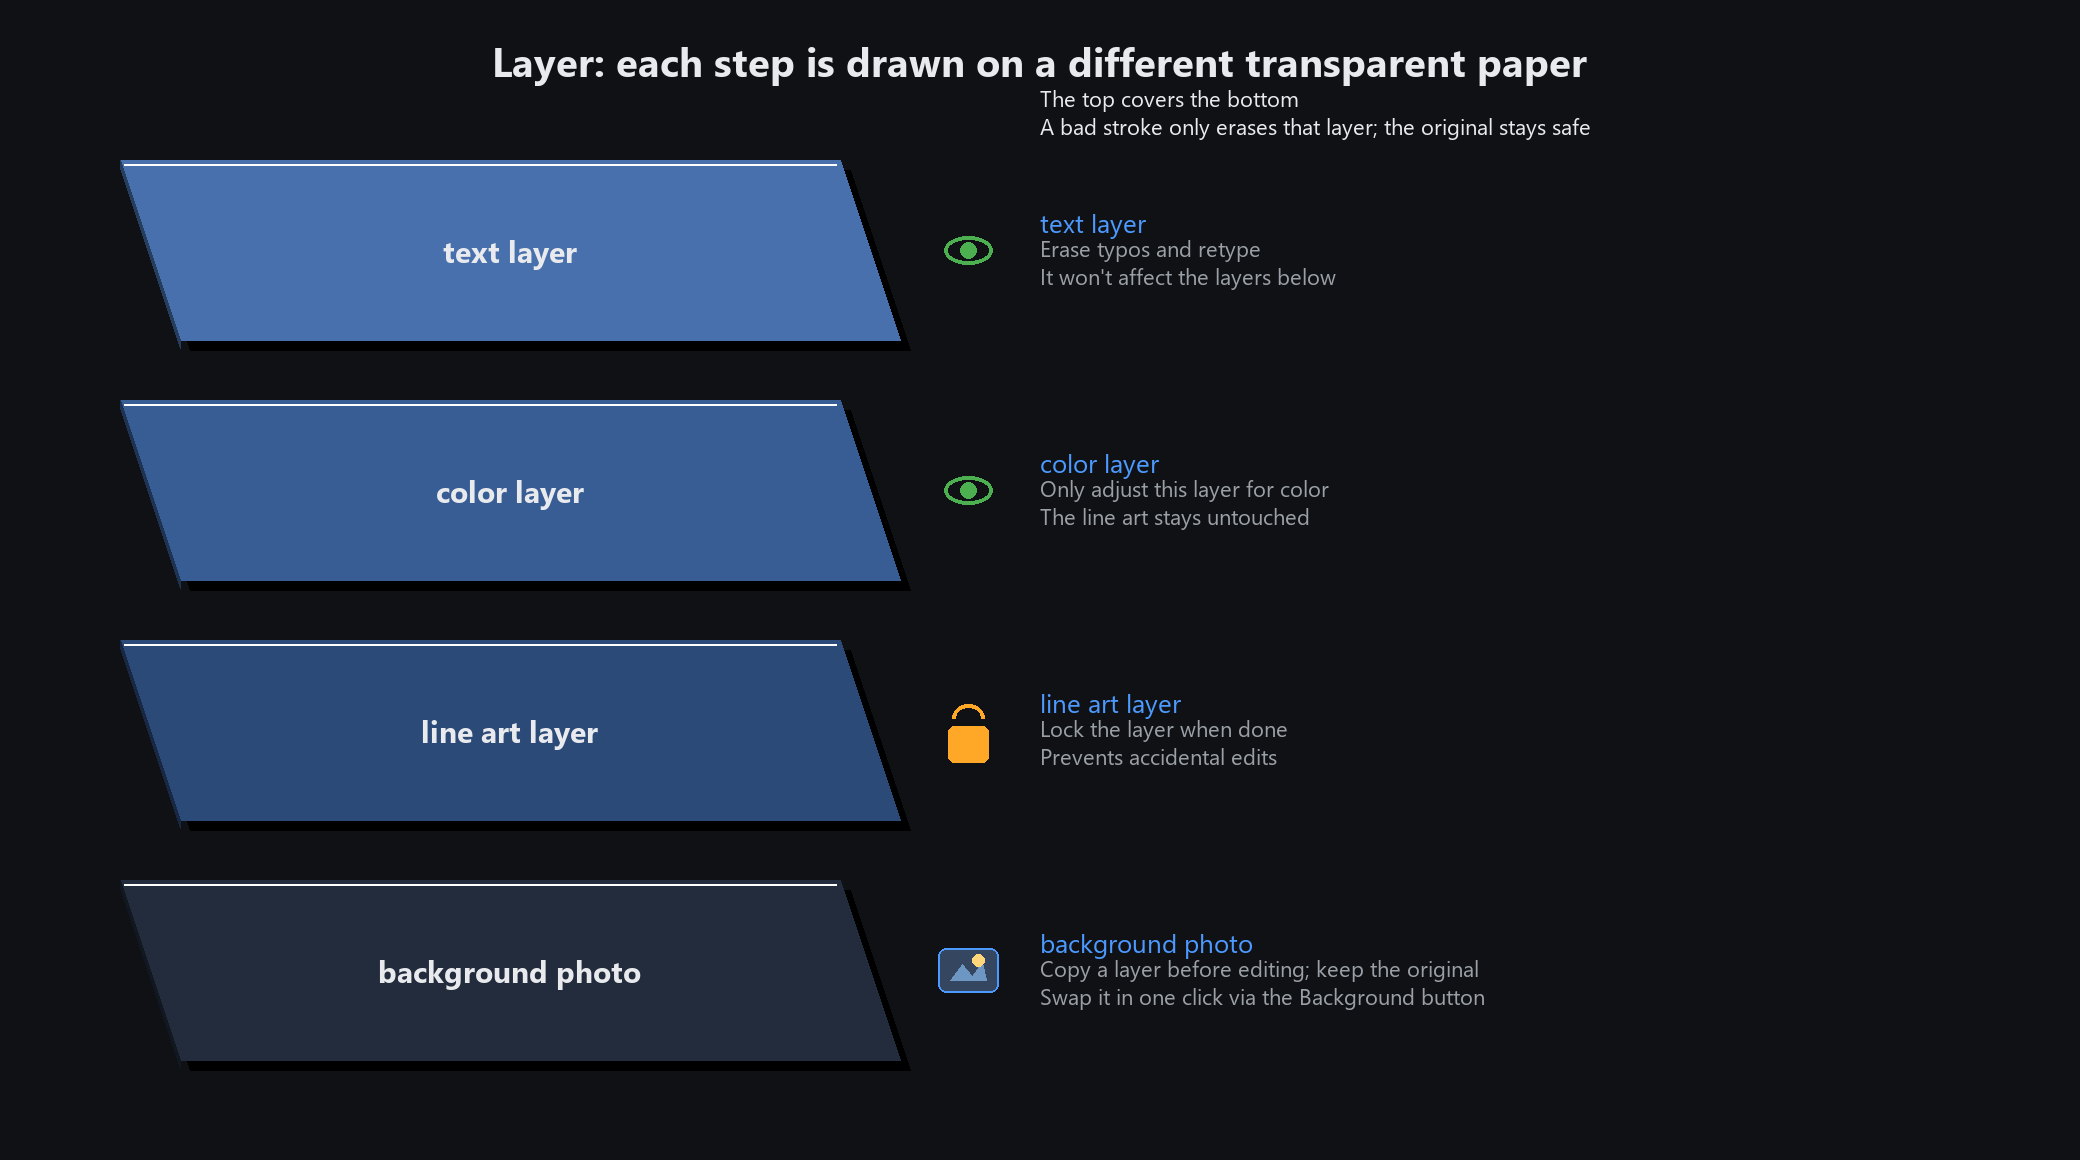
Layers are a stack of transparent sheets. The top one holds the line art, the middle holds colour, the bottom holds the background.
Edit the middle sheet and the other two stay untouched.
What happens without layers
Everything sits on one image, so any change means erasing and redrawing. With layers you just close the eye icon and the change is gone.
Suggested layering
Background on its own layer
Subject on its own layer
Colour on its own layer
Line art on top
Text separate, so it stays easy to edit
Anything you will keep editing tomorrow must be saved as .wci. Exporting to JPG merges the layers permanently
Common layer operations
New layer: the "+" at the bottom of the layer panel
Delete: select the layer, click the bin
Reorder: drag layers up and down. Higher layers cover lower ones
Show/hide: click the eye icon. Hidden layers are not exported
Opacity: per layer, for blending and fade-ins
Merge: select the layers and use "merge layers"
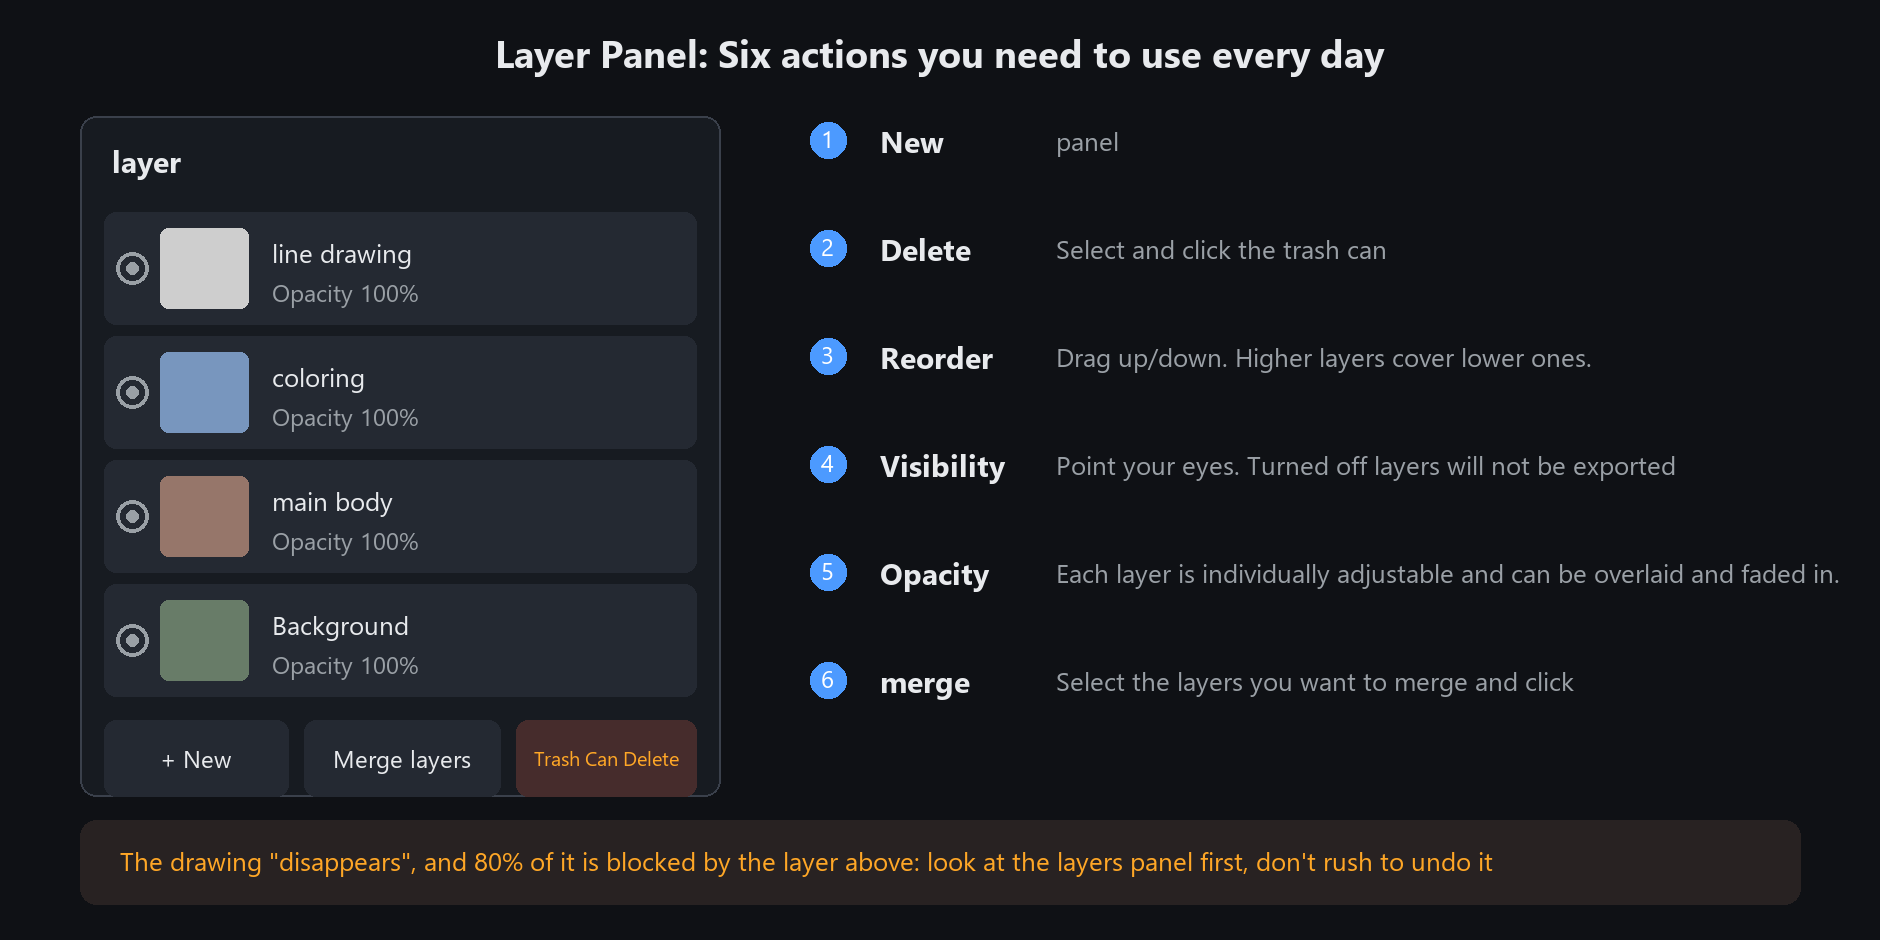
Reordering is what you will use most. When something you drew "disappears", a layer above is usually covering it —
check the layer panel before reaching for undo
Layer masks: reversible editing
What it is
A layer mask controls visibility of the whole layer. White shows, black hides, and grey gives partial transparency. The original layer content remains intact.
Regular layer: edit a mask
Right-click the target layer in the Layers panel and choose Add Layer Mask. The app enters mask editing with an all-white mask, so the whole layer remains visible. The mask brush starts in black.
Paint with the pixel brush, vector pen, or highlighter, or drag a rectangle, rounded rectangle, ellipse, or line. These marks change the greyscale mask without changing the original layer; vector strokes are rasterized in the mask. Make a selection and click with the paint bucket to fill it. Without a selection, the bucket fills a connected region using the current tolerance.
The foreground colour is converted to mask greyscale: black hides, white reveals, and other colours produce partial transparency according to luminance. The grey slider also updates the foreground colour; hold Alt to temporarily reverse it. White can reveal only pixels that already exist on that layer. You can adjust brush size, mask opacity, and shape bounds.
Later changes
Use Mask Properties or the layer context menu to invert, disable or enable, apply, or delete the mask. Disabling only pauses the effect; deleting restores the original layer view. Applying bakes the result into a raster layer and can be undone. The context menu also converts between a selection and a mask.
On the Background row, adding a mask first promotes the background to a layer and creates an adjustable radial mask. The separate Create Mask button in the top toolbar converts selected text, arrows, or shapes into a component outline mask; they need a base image beneath them on the same layer.
Saving: project or export
Two kinds, two purposes
.wci project: keeps layers, masks, portrait settings and filter settings. Use this for unfinished work
Export (JPG / PNG / WEBP): the flattened result. Export when sending to someone or uploading
Which format
Need transparency → PNG. JPG has no alpha channel
Posting online, watching file size → JPG at around quality 85
Smaller and still transparent → WEBP
Get into the habit: Ctrl+S saves .wci while you work; when finished, save a separate flattened copy.
Save only a JPG and next time even changing one word means redoing everything