Feature 5 · Portrait retouch
9 topics from the in-app manual.
Portrait panel: four tabs, four jobs
How to open
Menu Portrait → Portrait retouch / makeup. A dedicated panel appears on the right.
Four tabs
Beautify: smooth skin, whiten, even skin tone, remove dark circles, brighten eyes, remove blemishes, brighten skin (7)
Reshape: slim face, V-face, narrow nostrils, raise nose bridge, chin, forehead, enlarge eyes, open eye corners (8)
Makeup: 7 areas including brows, eyes and lips, plus 8 complete presets
Skin: remove blemishes, remove spots, smooth skin, even skin tone, remove shine, whiten teeth, soften nasolabial folds (7)
Three more at the top
The top strip switches between portrait / hair colour / hairstyle. Hair colour recolours hair; hairstyle swaps the style.
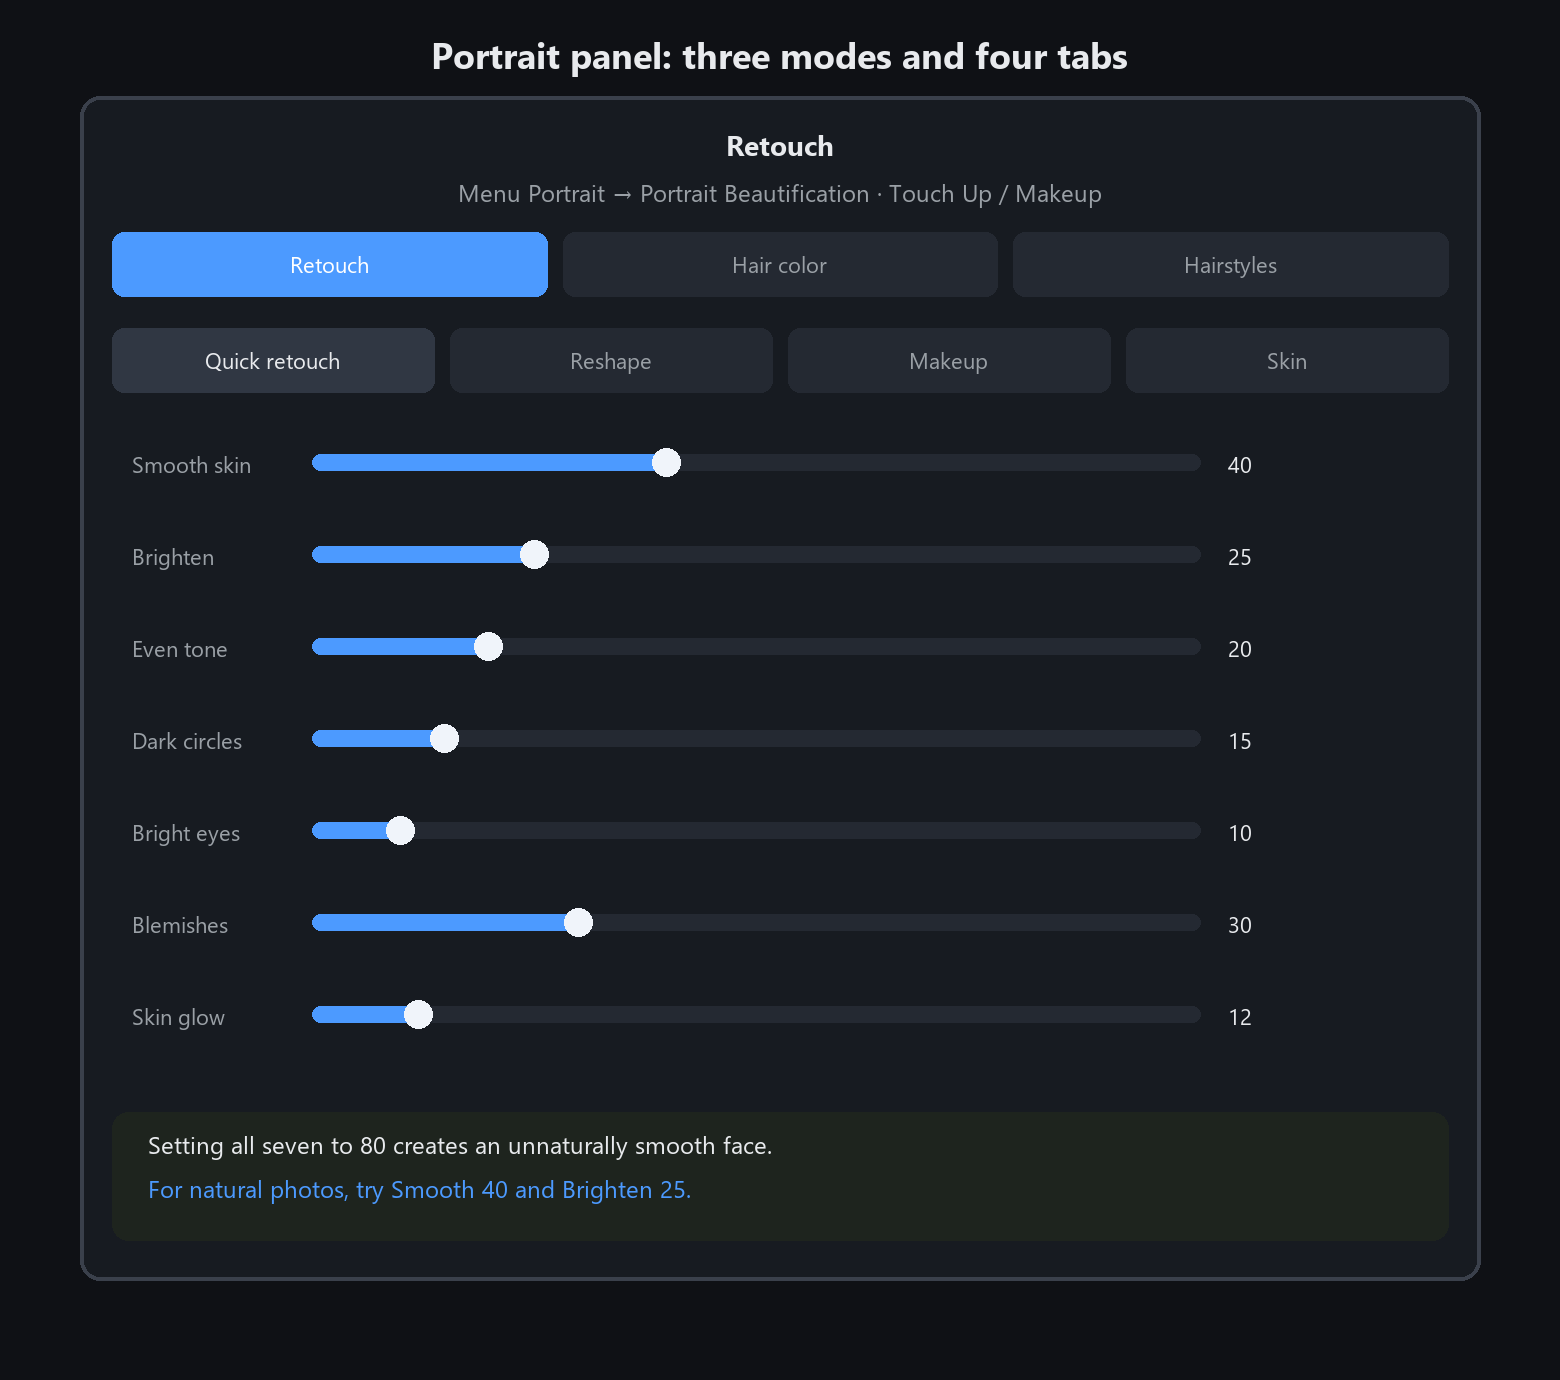
Every change lands on its own portrait layer. Close the panel and reopen it to keep tuning — the original is never damaged
Beautify tab: how to balance seven sliders
Suggested approach
Move only two at first: smooth 40, whiten 25. Look, then decide about the rest.
What each does
Smooth skin: heavy smoothing looks like plastic. Past 60 the skin texture is gone
Whiten: brightens without shifting hue. Up to 30 stays natural
Even skin tone: evens out red or yellow patches. Very useful with visible blotches
Remove dark circles: for tired faces. Do not overdo it or the under-eye area turns grey
Brighten eyes: lifts the whites and catchlights only. It does not enlarge the eyes
Remove blemishes: spot-type flaws. Different from smoothing, which works on the whole area
Brighten skin: lifts overall tone by one step. Unlike whiten, it keeps more of the original hue
Group photos: one face at a time
At the bottom of the panel there is a "Next face 3/5" button — the app detects every face in the photo
and lists them one by one. Click it to move to the next person; each face keeps its own independent
set of smoothing, whitening and makeup parameters. That is how you beautify a group photo person by person:
tune A, switch, tune B, switch again. When the button reads "Re-detect", click it to scan faces again
(use it if someone was missed).
Pushing all seven to 80 gives you "a face with no pores". Real photos usually need two
Reshape tab: what eight sliders can change
What each moves
Slim face: pulls the cheeks inward. The most visible of the eight
V-face: tightens the jawline, sharpening the chin area
Narrow nostrils: pulls the wings of the nose inward, making the tip look smaller
Raise nose bridge: brightens the bridge line. It *looks* higher; nothing actually moves
Chin: adjusts length. A small nudge is enough for frontal shots
Forehead: fullness, which also affects how the hairline reads
Enlarge eyes: scales the whole eyeball up
Open eye corners: lengthens the eye opening. Longer, not rounder
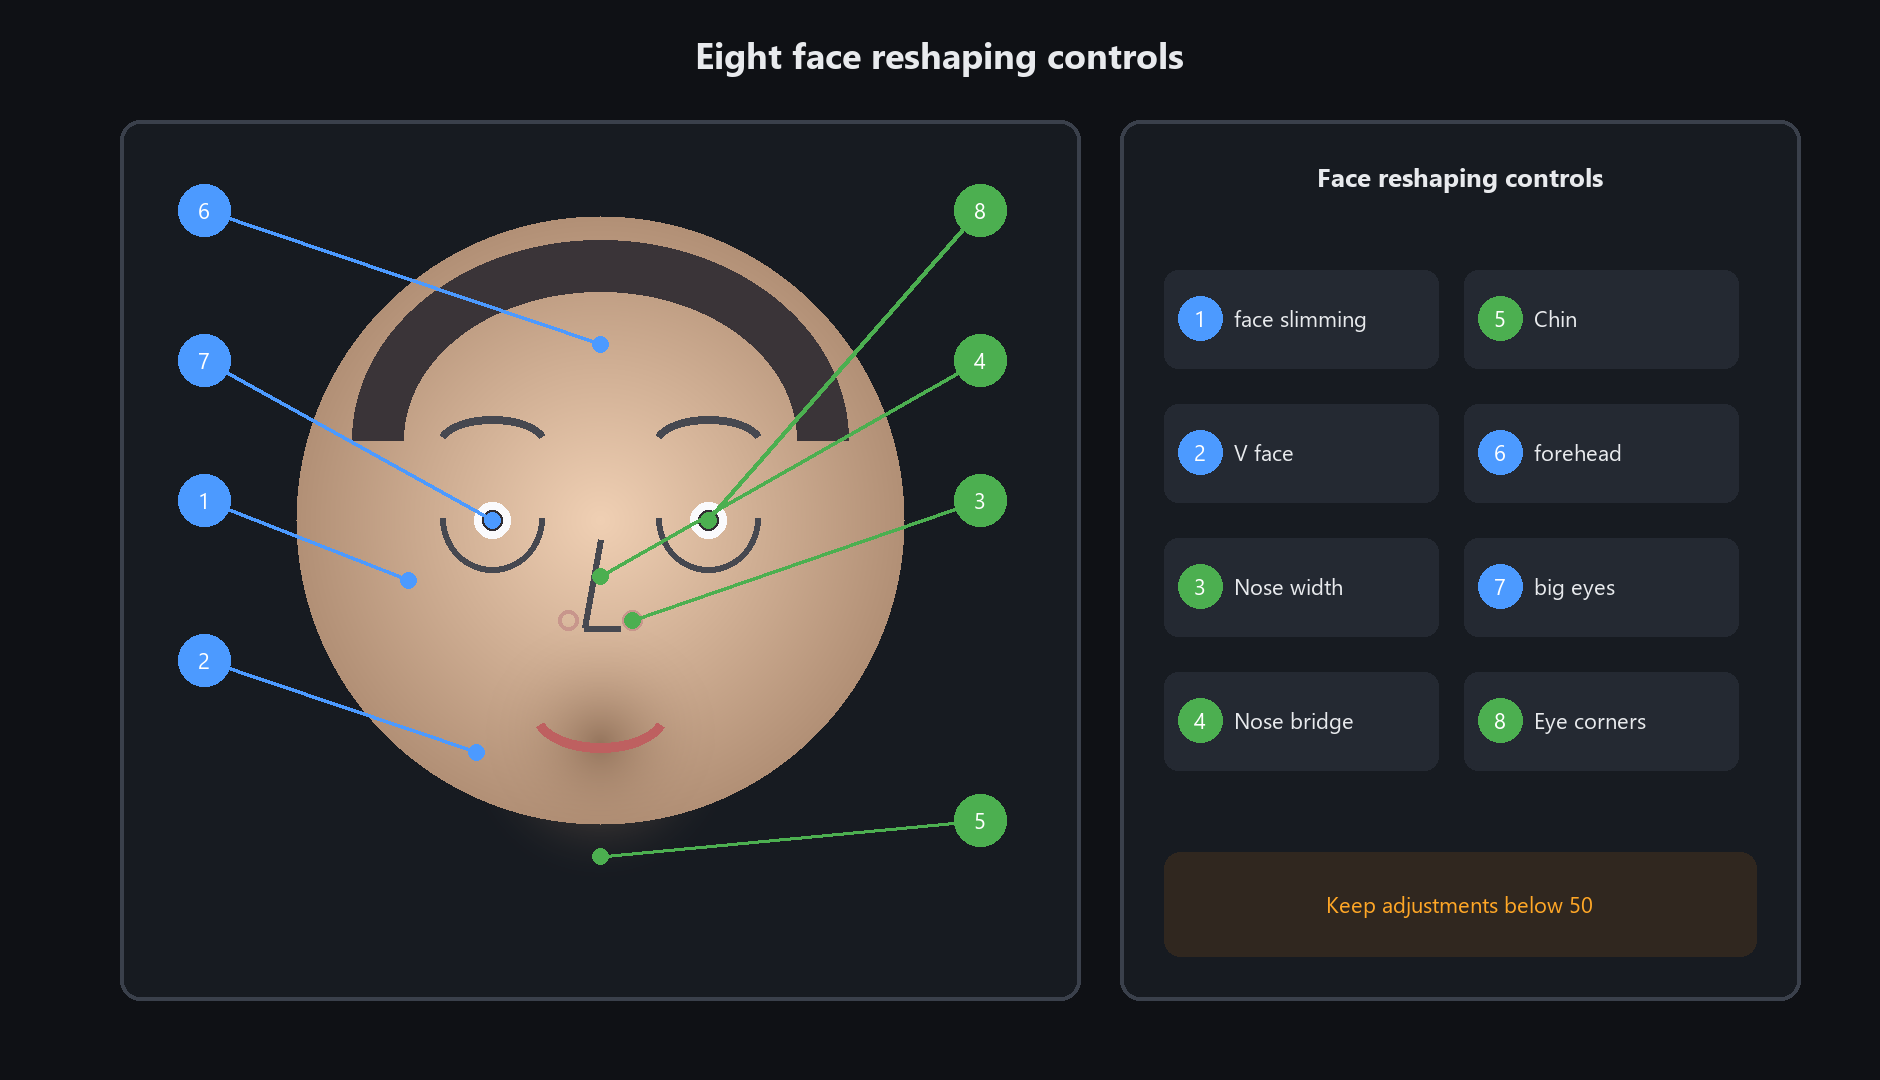
Keep all eight below 50. Faces are extremely sensitive to proportion — push too far and people cannot say what is off, they just feel it is not you
Go easy on slim face in profile shots. The landmarks assume a frontal face, so profiles can warp
Makeup: seven areas and eight presets
Seven areas
Brows, eye shadow, eyeliner, lashes, coloured lenses, lips and contour. Each takes its own colour, intensity and blend mode.
Eight presets
If tuning each area is too much, use a preset: everyday nude, energetic orange, cool and distant.
Each preset sets the palette, intensities and modes at once — one click changes the whole look.
Fine tuning
Start from a preset, then adjust one thing. For example, with energetic orange but lips too strong,
just pull lip intensity down and keep the rest.
Makeup is placed using facial landmarks, so frontal photos with clearly visible features work best.
In profile, with glasses, or with hair covering half the face, the makeup can drift — lower the intensity by hand
Skin tab: how it differs from beautify
The split
Beautify is about "looking better overall". Skin is about "fixing specific problems".
Seven items
Remove blemishes: individual inflamed spots
Remove spots: patches of pigmentation and sun spots
Smooth skin: softens the whole area (same algorithm as in the beautify tab)
Even skin tone: evens out redness and yellowing
Remove shine: the highlights on forehead and nose. A lifesaver for oily skin
Whiten teeth: teeth only; it will not brighten the lips along with them
Soften nasolabial folds: fades the lines from nose to mouth. Very visible on older faces
Order: spots first (remove points), then even tone (flatten), then smoothing (soften). Reversed, you smooth the flaws into the skin
Hair colour and hairstyle: five controls
Hair colour
Switch to "hair colour" at the top of the panel. Four controls:
Colour: 15 swatches, from natural black through linen, dusty green and pink-brown
Dye intensity: how strong the colour lands. 30 to 60 stays natural; at maximum it looks fake
Blend mode, one of three: even (one colour throughout) / gradient (darker roots, lighter ends) /
highlights (only part of the strands, the closest thing to a real salon dye)
Grey coverage: targets grey hair specifically, leaving the rest of the colour alone
Edge tolerance: how wide the hair-to-background boundary is counted. Raise it if a rim of colour appears
The hair mask is computed by AI, so only the hair takes the colour, not the face.
Hairstyle
Switch to "hairstyle" for three sliders: volume / flat (how much hair there seems to be),
crown height and hairline (how much forehead shows). These are fine tuners — they will not give you a completely different cut.
Order: pick the colour, set the intensity, then pick the blend mode. For a natural look choose highlights;
an even dye is the easiest to spot as dyed
Do not use it when hair is mostly hidden by a hat or scarf, or when the background colour is close to the hair.
The mask will not separate them and the hat or background gets dyed too
Auto beautify filter vs the portrait panel
Two different things
Filter → Auto beautify: automatic correction of the whole photo (levels, contrast, white balance, vibrance, clarity).
Works on landscapes, still life and food too — not just people.
Portrait panel: face and skin only, positioned using face detection.
Order when using both
Run auto beautify first to fix exposure and overall tone, then open the portrait panel for the face.
The other way round, auto beautify will pull the skin tone you just tuned all over again.
Auto beautify has 5 checkboxes (including adaptive vibrance and clarity), all on by default.
If the photo looks "fake", untick clarity — it usually looks natural immediately
Portrait relight: choosing among five light positions
How to open it
Menu Portrait → Portrait relight. A relight panel appears on the right.
This is a different thing from portrait beautify: beautify changes the face and skin, relight puts a new lamp on the existing photo.
Five preset positions
Butterfly: high and frontal, with a small butterfly-shaped shadow under the nose. Slimming; ID and profile shots
Loop: about 30 degrees to the front-side. The universal choice that suits anyone
Rembrandt: 45 degrees to the side, with a triangle of light on the cheekbone. Dramatic; portrait work
Side: straight from the side, half light and half dark. Hard contours, for men and a tough look
Rim: from behind and to the side, tracing the outline. The first four add to the existing light; this one relights
Five sliders
Light direction (±180 degrees), light height (±80 degrees), intensity (%, start around 30),
softness (%, higher means softer edges) and colour temperature (−100 cool to +100 warm).
Two more groups
Light colour, 6 options: neutral, warm, cool, rose, cyan-blue and violet
Scope, 5 options: face / upper body / person / current selection / whole photo
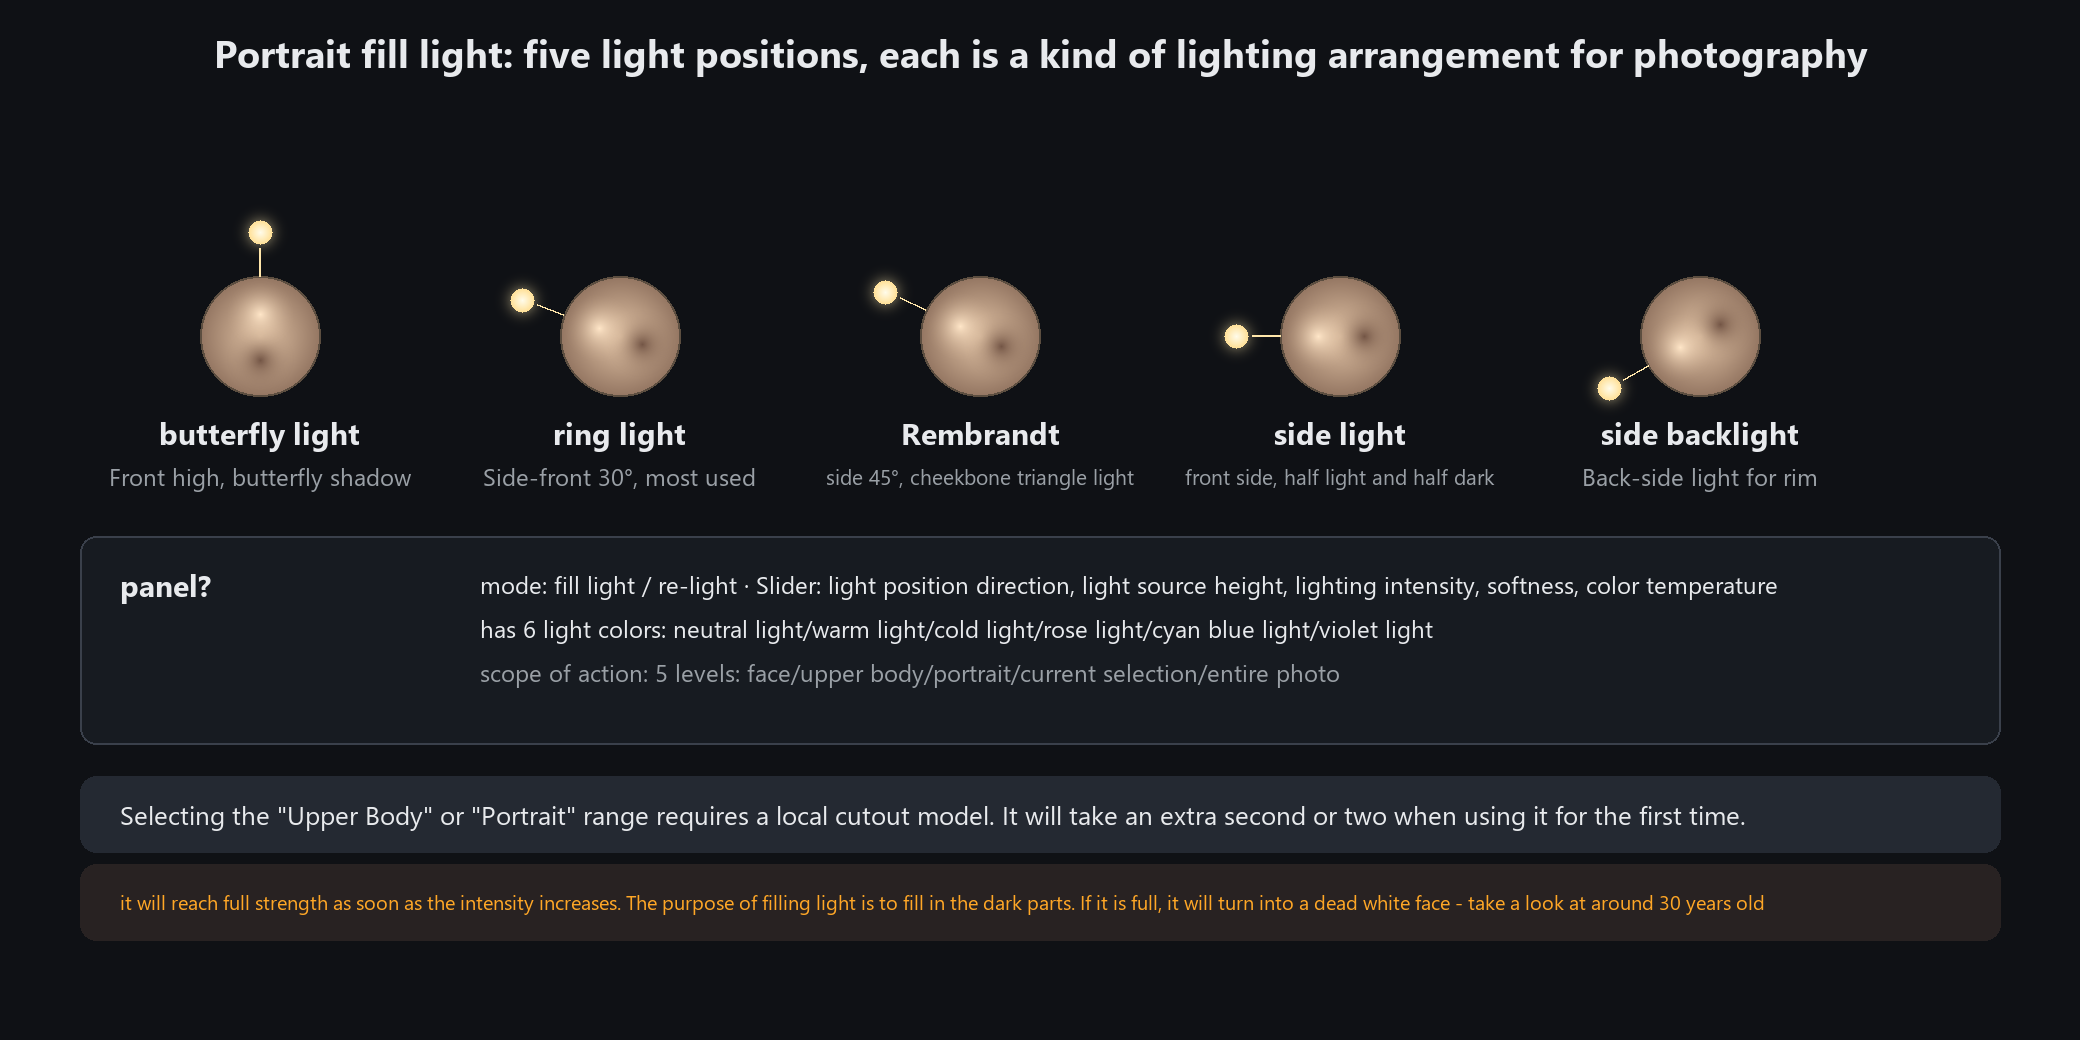
"Upper body" and "person" need the local matting model to find the subject; without it you get a message.
"Current selection" needs a selection made beforehand, or it warns you too
Do not start by pushing intensity to maximum. Relight fills shadows; maxed out you get a flat white face — try 30 first
Soft skin, skin tone, portrait background blur
Three one-slider shortcuts
Soft skin: softens skin across the area without moving the features. Faster than smoothing inside the portrait panel
Skin tone: brightens skin areas only; the background is untouched
Portrait background blur: cuts the person out and blurs what is behind
All three live in the Portrait menu. Choosing one opens a dialog with a single strength slider.
Two things in the dialog
Live preview (on by default): see the result as you drag
Press to see original: hold it to show the unprocessed image for a direct comparison
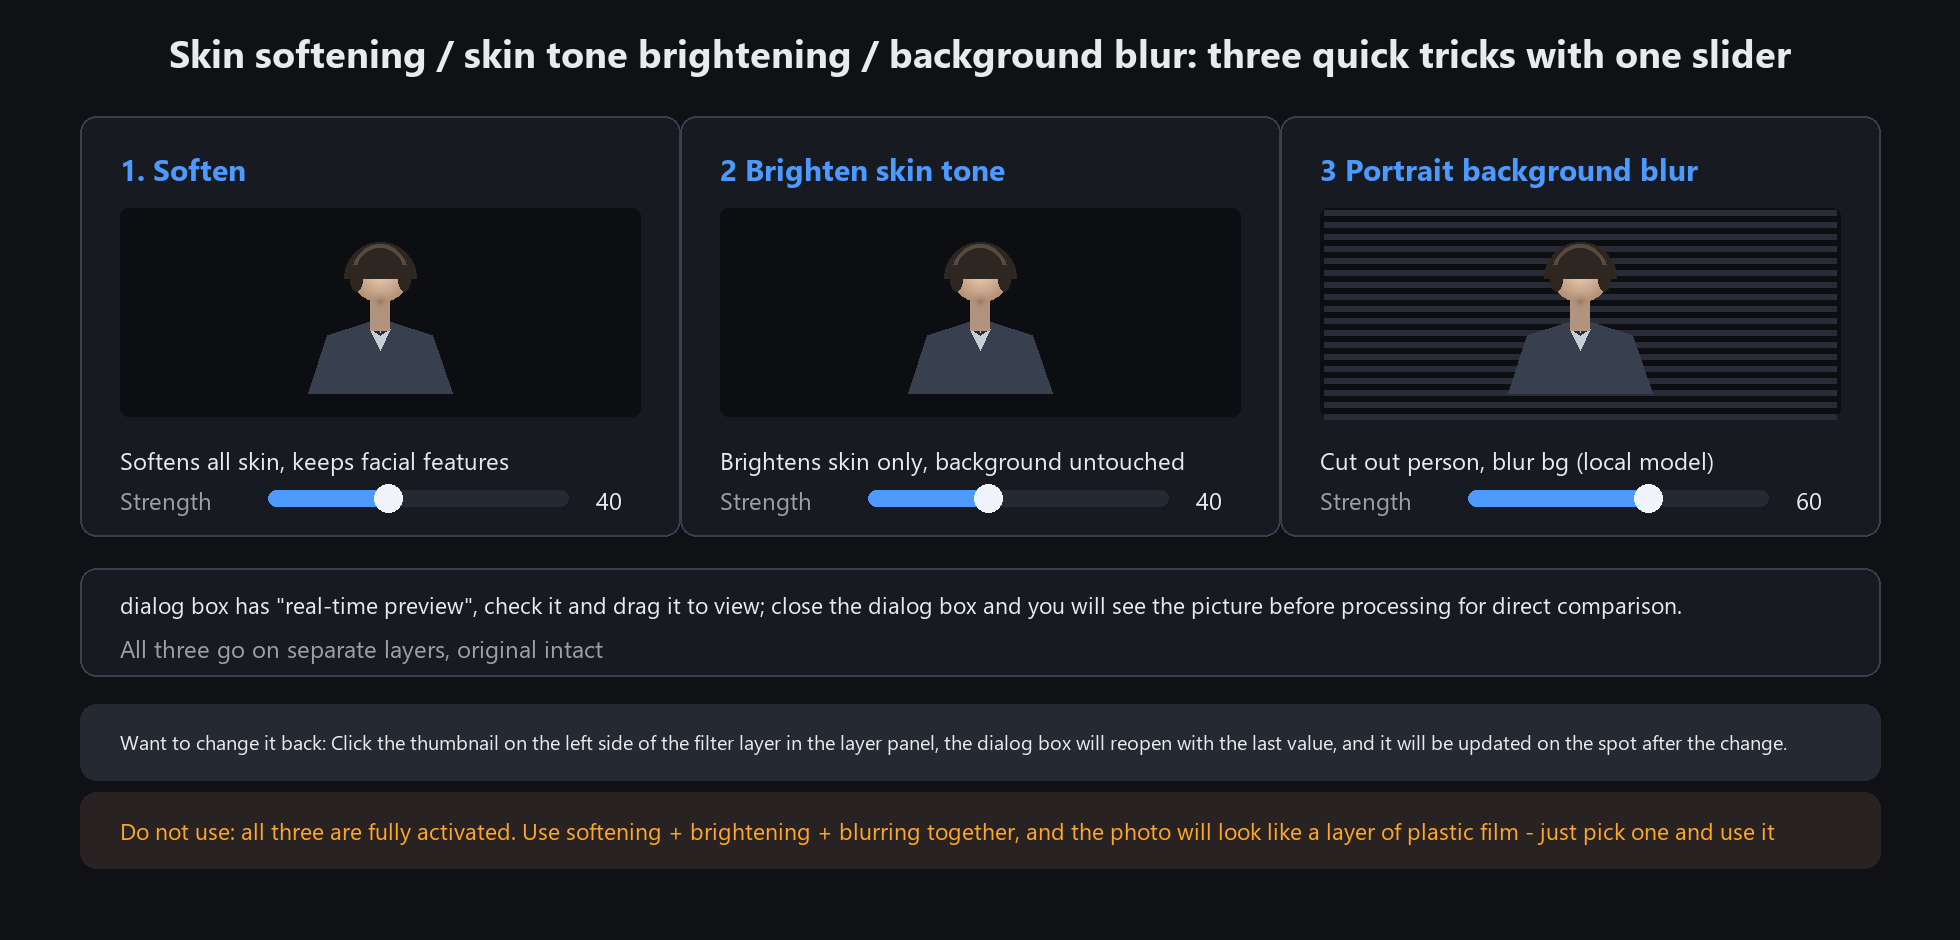
All three land on their own layer, leaving the original intact. To retune: click the thumbnail at the left of that
filter layer in the layer panel, and the dialog reopens with your last values, updating in place
Soft skin and skin tone need a detectable skin area, or you are asked to use a clearer portrait; background blur needs the local matting model
Do not run all three at full strength. Soft skin plus skin tone plus blur looks like a plastic film — one of them is usually enough